As my Twitter poll was inconclusive 😃 (Why do I even use Twitter nowadays?..), I made an executive decision© and went for shutters as the topic for this post. Ultimately, it all started with them, so it kinda makes sense to tell their story first.
Before I begin, there’s one thing that confuses me. If you speak German, you just say “Rolladen,” and everyone understands what you mean. But in English, there are way too many terms: blinds, roller blinds, shutters, roller shutters, shades, you name it. I tried to Google it, as just translating the word doesn’t help. The only conclusion I made is that “shades” is probably not the right one. That’s it.
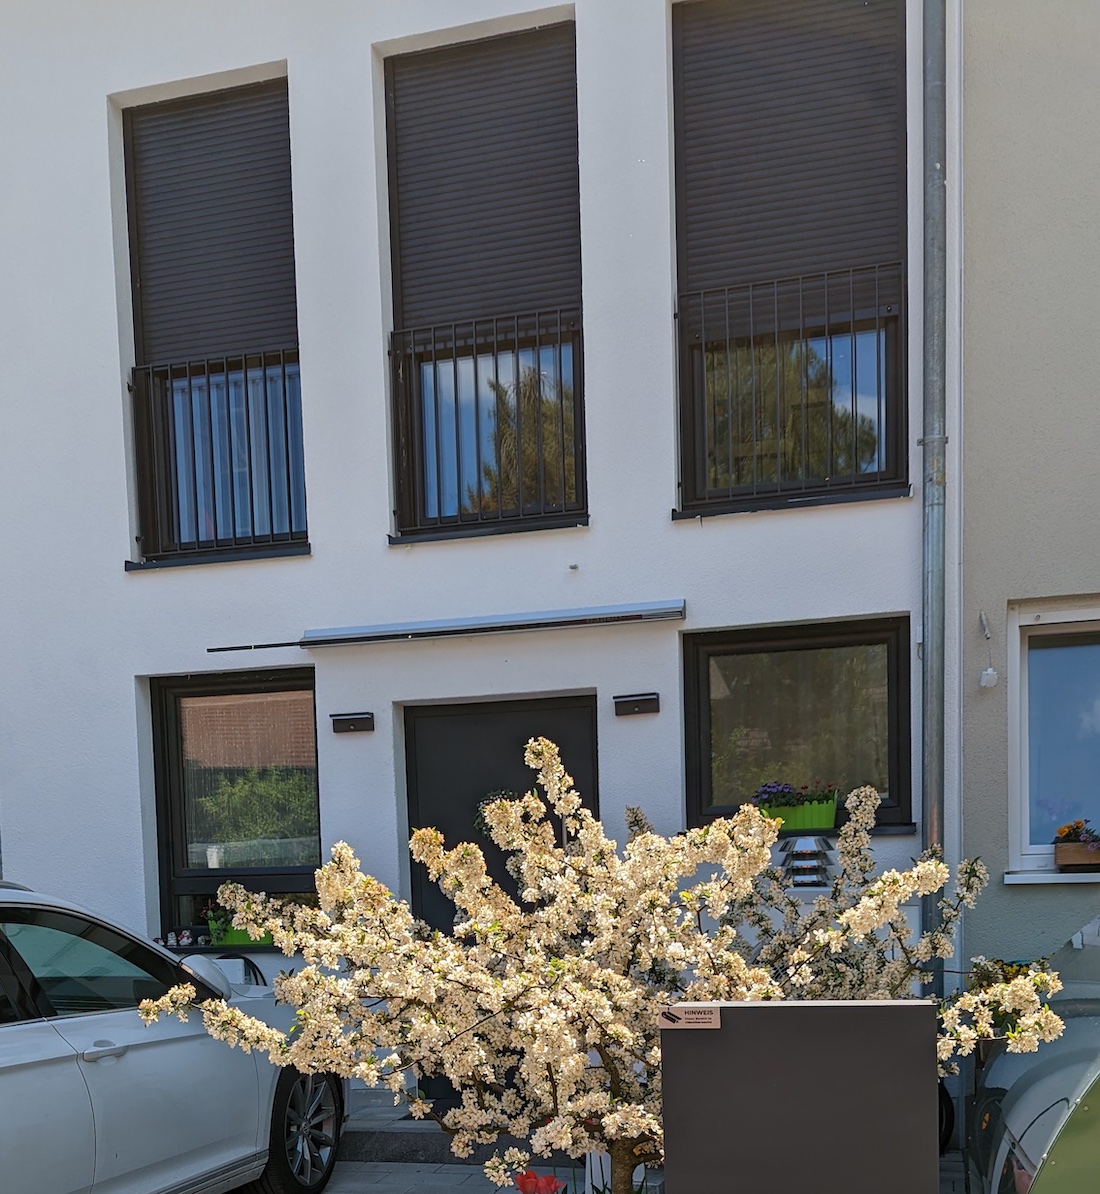
To avoid confusion, I decided to say “shutters” to denote what I have: metal blades that are capable of rolling in and out of their boxes but cannot spin around their axis. You can find them partly closed in the real-world picture below. If you know the right word for them, please let me know. But until then, I’ll stick with “shutters.”
Setup Link to heading
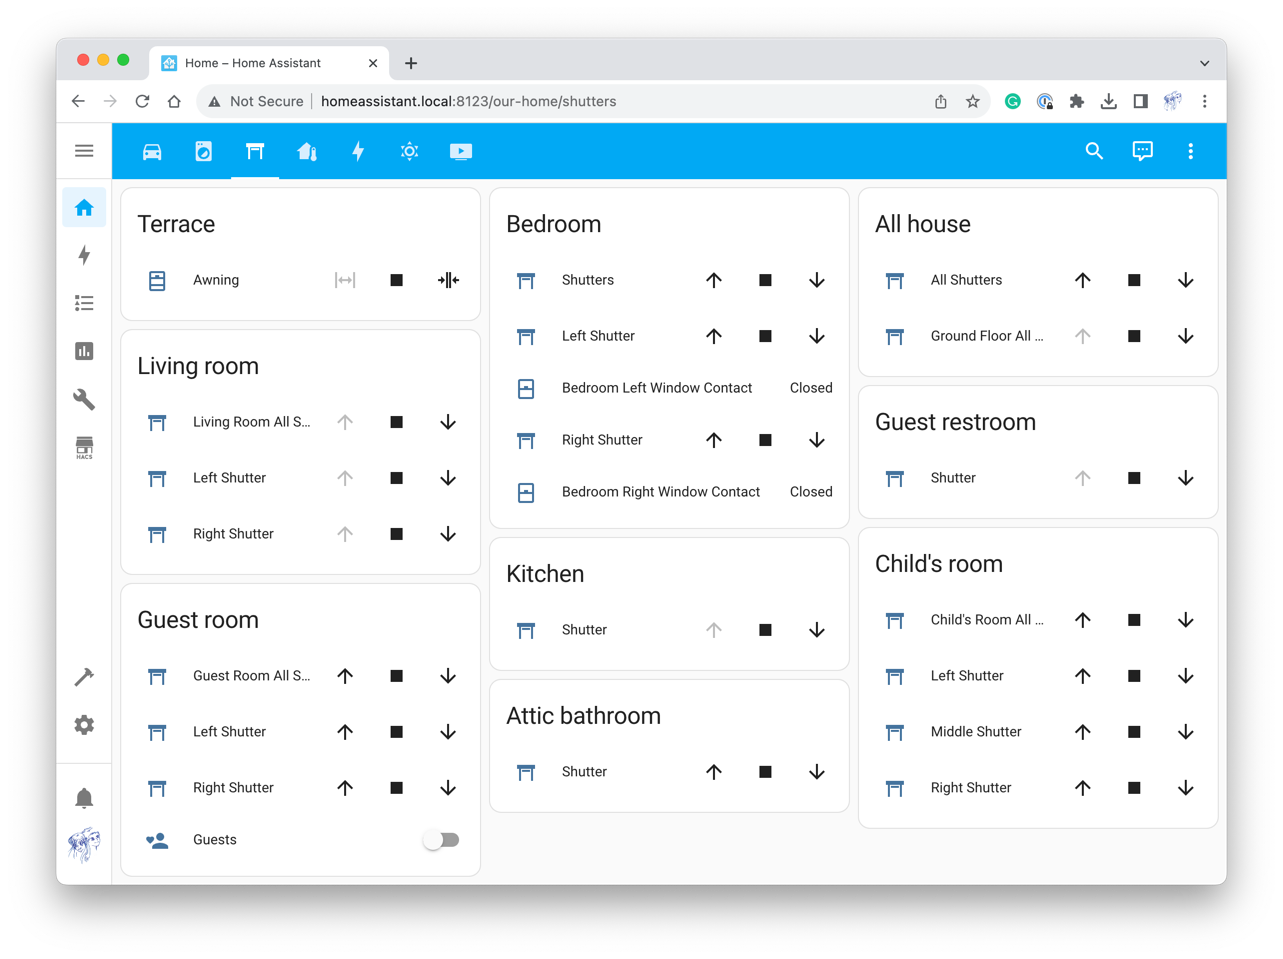
Let’s talk about the setup first. Our house happens to have fifteen windows and a terrace with a glass roof. Four of these windows are located underground inside light wells and thus don’t have shutters as they barely have light reaching them. One of these doesn’t even have a glazing (more about this in a post about ventilation). On the other hand, a window attached to the terrace is divided in two so that one part can become a door. All in all, we have twelve shutters and an awning. Some of these shutters are combined into groups depending on their room/floor, so you can see more elements in a screenshot from the older post.
Our first apartment in Germany, where we lived for two years, had electric shutters. We found them so convenient that when the next flat had manually operated ones, we got to miss making it all dark with a press of a button. For our own house, we went the extra mile to make it possible to operate every shutter remotely. We never regretted this decision and still use wall-mounted switches occasionally. But soon we realized that we needed more.
Our house complies with the KfW 55 energy standard, meaning that our building loses 55% less energy than the reference one. It works well for our pockets in winter when we use a heater to bring energy into the building. On the contrary, in summer, it stays cool for a while until we forget to close the shutters. Then it gets warm from the Sun and doesn’t cool until autumn as we don’t have an AC. It became apparent that the solution is simple: close the shutters when it’s sunny.
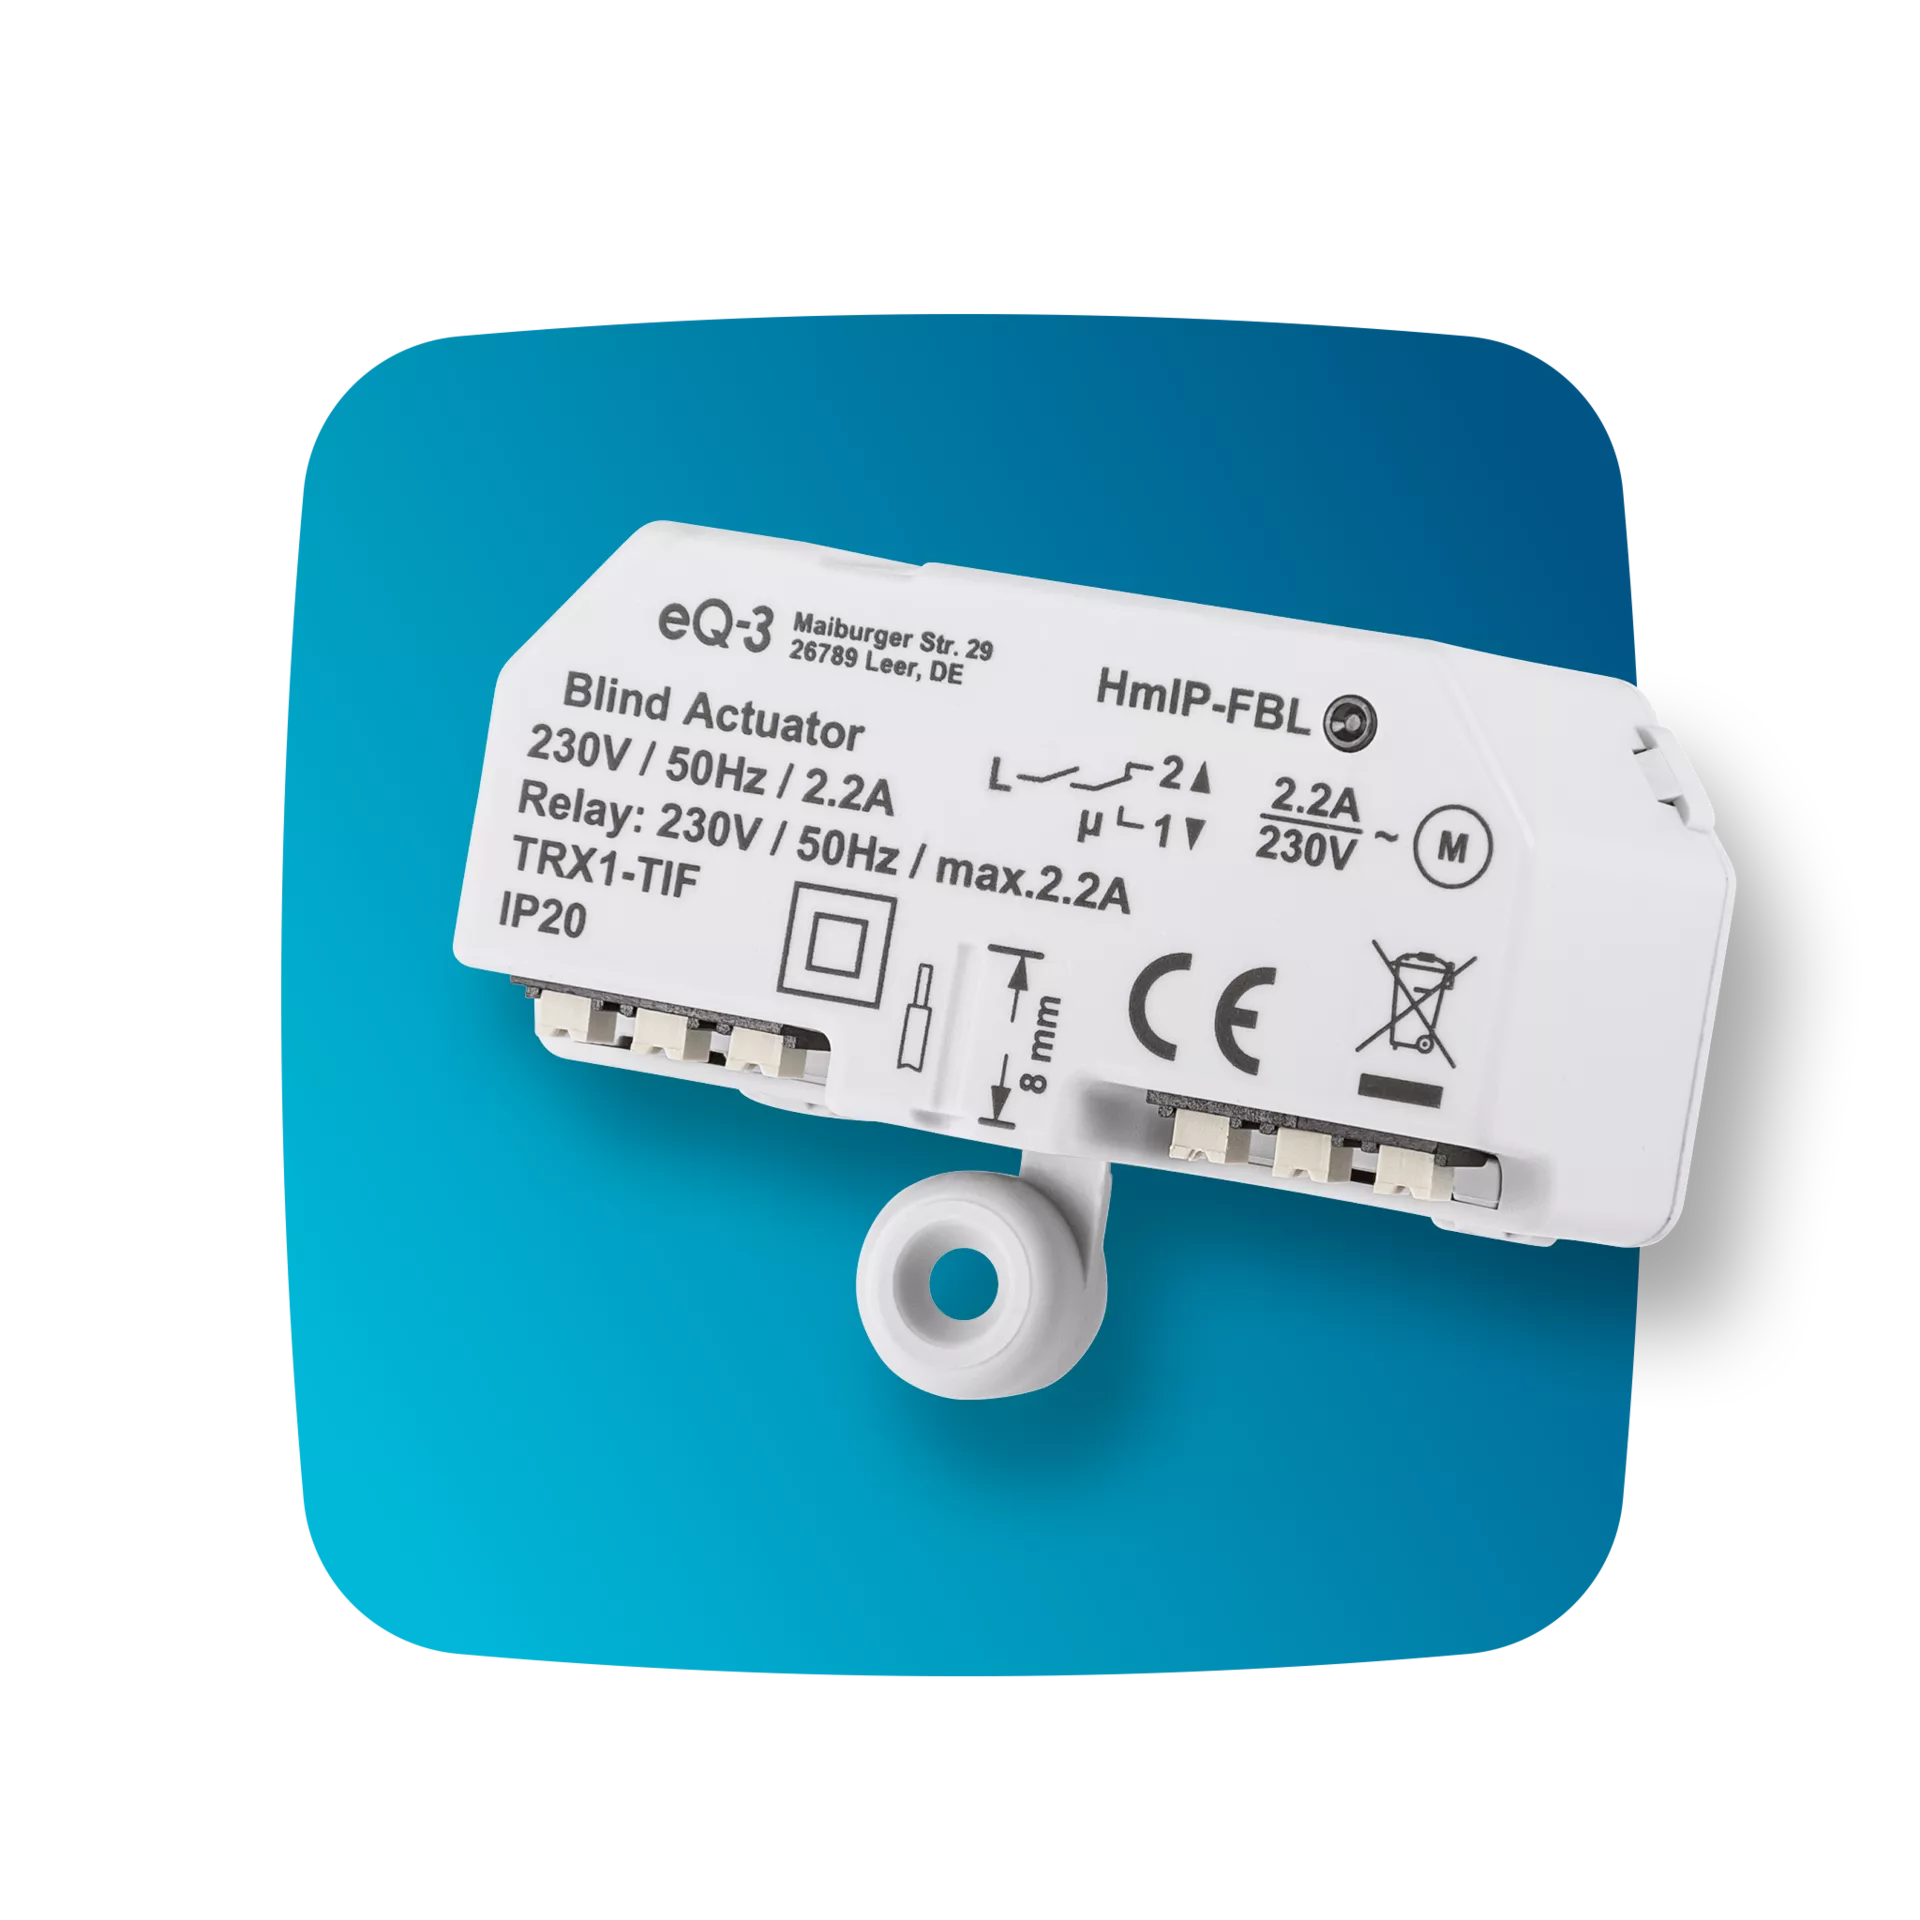
As we were already using wall thermostats by Homematic, I decided to go with their blind actuators. Their advantage is that they go into connector sockets next to boxes where shutters are hidden. This way, we could keep the original wall switches. Even though the electrician prepared the house right, it took me a few attempts to figure out how it’s all wired together. After that, the installation was relatively simple. I’m not fully satisfied with how the result looks, but it works as expected. I’ll probably make another pass to make it look better at some point.
Unfortunately, Homematic didn’t solve all the problems. We still had attic windows by Velux and an awning by Somfy. I saw that some people on the Internet manage to integrate them with Homematic IP by physically modifying the buttons (read: soldering). As I wanted to keep everything in its original state so my family could easily use it, I decided to go a simpler but more expensive way: I just bought Internet bridges from the vendors. I lived with three apps for some time until I learned about Home Assistant. Just the fact that it all now lives in one place is already a vast improvement!
Automations Link to heading
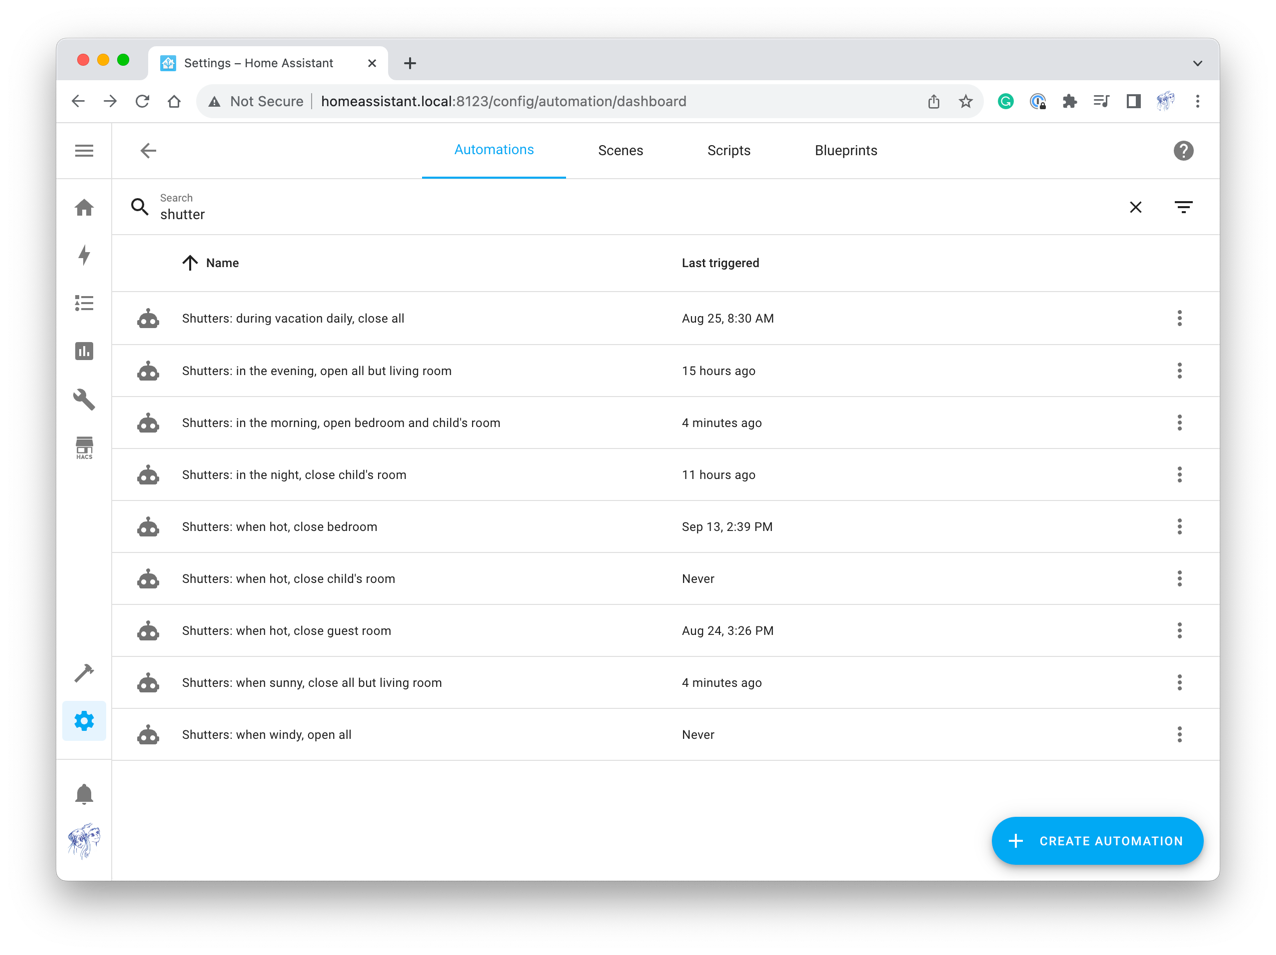
I have a couple automations around shutters. They can be roughly divided into two groups: weather and time conditions, with the exception of a vacation-related one. The latter basically tries to keep all shutters down when the global vacation flag is up. I’ll cover the whole vacation topic in a separate post.
Weather-driven automations Link to heading
Speaking of weather, there’s a group of safety automations that either try to prevent the house from overheating (“when hot”) or protect shutters from strong wind (“when windy”). The first group reacts to rising room temperature, supposedly due to direct Sun exposure, and closes corresponding shutters. The second group watches a weather forecast and opens all shutters to save them from gusty wind. I have a long-standing plan to switch this automation to the information from my Smart Anemometer by Netatmo. However, I still didn’t have a chance to change its batteries 🤦 These automations are inspired by the Homematic IP app and what we have in the office. They fire rather sporadically.
The last weather-related one, “when sunny,” typically works several times a day. As this is the automation I was building the whole system for, I’d like to describe it in more detail.
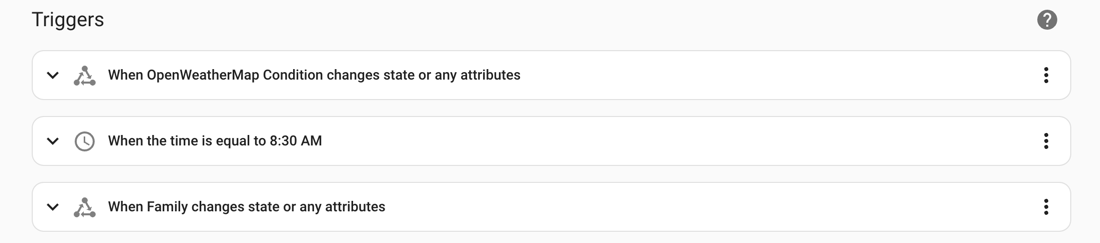
Like any Home Assistant automation, it consists of three parts: triggers, conditions, and actions. The Triggers make the automation fire when the current weather changes, in the morning, and when someone comes or leaves. Additional checks are done in the Conditions section.
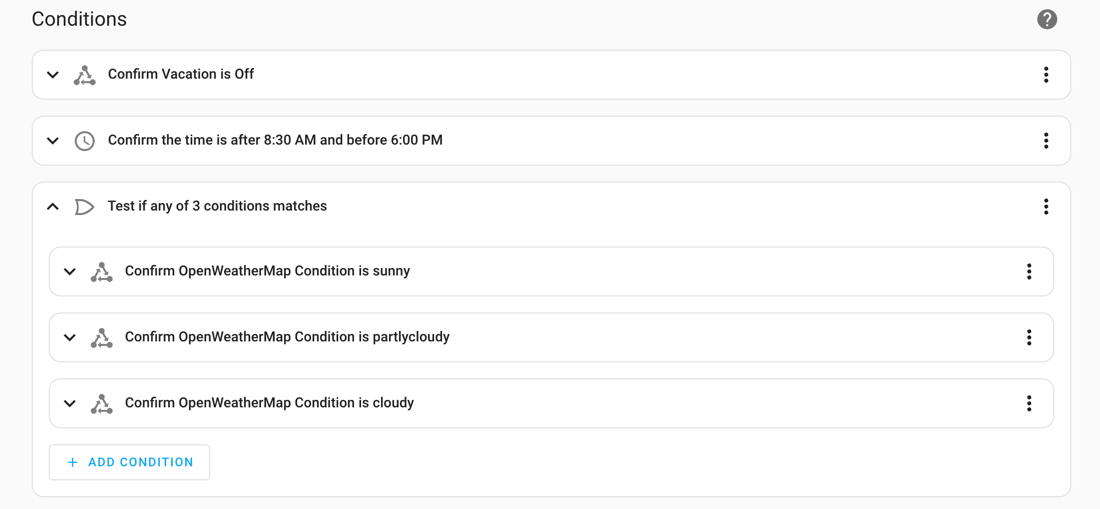
The first condition prevents the automation from working when we’re on vacation, as all shutters are expected to be closed anyway. (Remember a dedicated automation for this?) The second ensures that the action happens only during the day. The third checks that it’s actually sunny outside. I had to include “partly cloudy” and “cloudy” as the forecast updates once an hour, so these conditions could quickly develop into “sunny” without the automation noticing. In the future, I could switch to using a brightness sensor. But for now, the forecast works well enough.
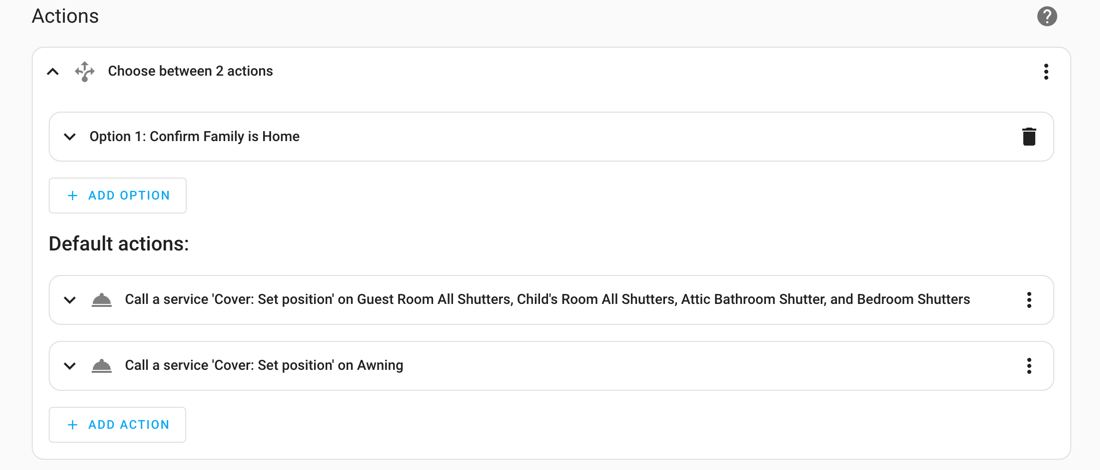
Even though there are two branches, the actions are the same: they close shutters everywhere but in the living room and a terrace awning. The only difference is that if someone’s home, there’s still a bit of light coming in. As the automation is triggered when my wife comes home, she likes to say that the house welcomes her by opening the shutters a little. It does indeed look funny as Home Assistant reacts pretty quickly to the location change.
Time-driven automations Link to heading
Turned out, shutters can work as an alarm clock. For this, they must be closed at night and opened in the morning at the exact time. Currently, the time is hardcoded inside the “in the morning” automation and depends on the day of the week. It’s not a big problem as the whole family lives according to the school schedule anyway. There’s a plan to make it possible to set an alarm time via a card, but I didn’t find a need for this yet.
As it’s now summer, we only close shutters at night in the child’s room as it faces a street. In winter, we close all shutters to prevent the house from losing heat. Depending on the weather, I’ll need to update the automations accordingly in a few weeks. It’s on my list to make it work based on the room temperature, so no manual update is needed.
Conclusion Link to heading
There are a couple more shutter-related things that I’d love to cover. For instance, there’s a Home Assistant card with a button that disables automations in the guest room when guests are in. It does something else, too, but I kinda feel that the post is getting too long, so it’s time to wrap up. Today, I covered the shutter setup as well as software automations around it. I hope it was interesting to read. Please let me know if I should write more about some of these parts. Also, don’t hesitate to tell me if I could do something better. I’m always glad to improve!
Here comes the next post, this time about how I automate shutters with @home_assistant. https://t.co/5iCWHD0Dtk
— Artem Khvastunov (@art_spb) October 5, 2023