Update Link to heading
Since GoLand 2021.1.2, there’s a dedicated TinyGo plugin. Consider using it as it simplifies configuration.
This is what gets born when you meet two smart interns 🙃 https://t.co/plf3kplqkh
— Artem Khvastunov (@art_spb) June 2, 2021
Original blog post Link to heading
I believe that you’re here because you already know what GoLand and TinyGo are. In this blog post, I’ll show how to work with the latter in the former. Ready? Let’s (Tiny)Go!
- Install TinyGo with the help of its Getting Started page. On macOS, it’s as easy as two terminal commands.
brew tap tinygo-org/tools
brew install tinygo
That’s it if you’re working with an ARM-based microcontroller. For AVR one like Arduino Uno, three more commands are needed.
brew tap osx-cross/avr
brew install avr-gcc
brew install avrdude
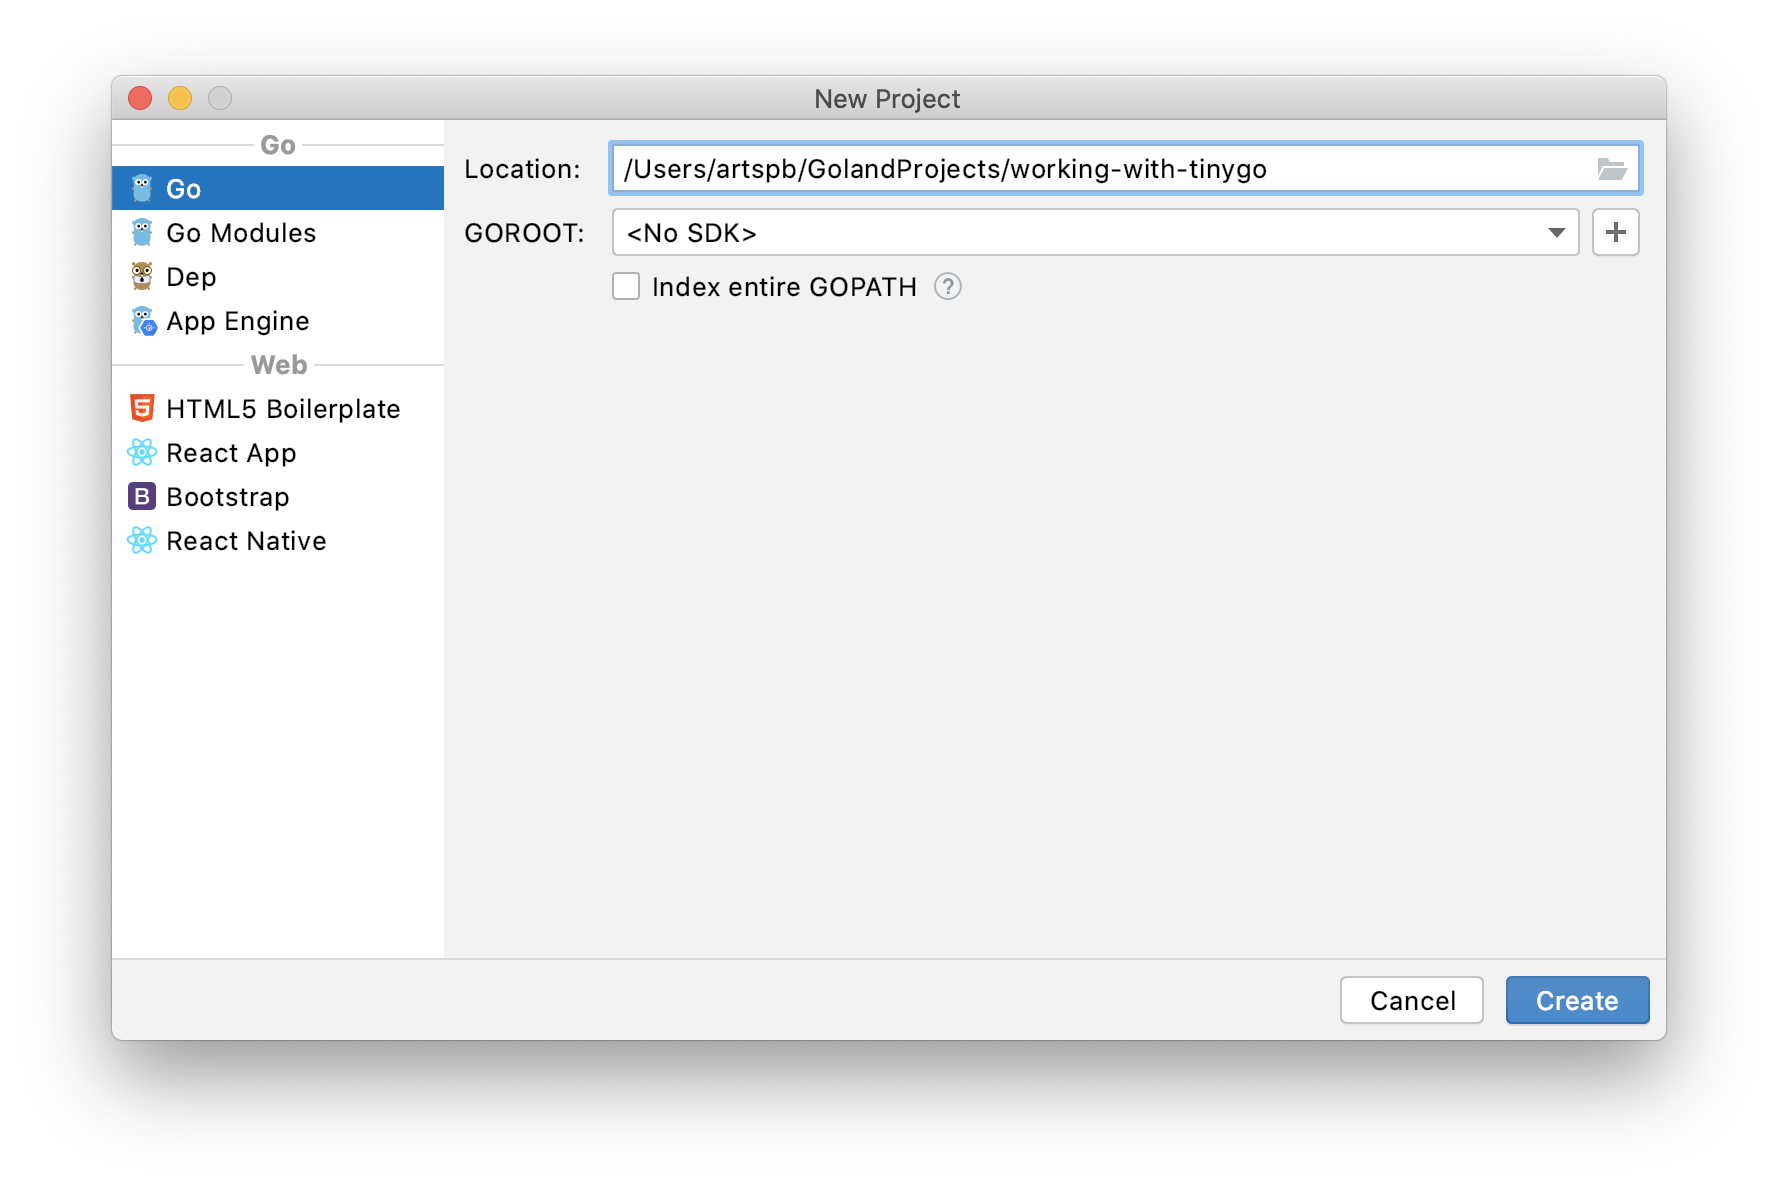
- Open GoLand and start creating a new project. It’s better to locate it outside of your regular
GOPATHto avoid unnecessary dependencies.
Please note that Index entire GOPATH from the previous picture should be unchecked for now; otherwise, GoLand might perform some unnecessary indexing. We’ll get back to this setting later.
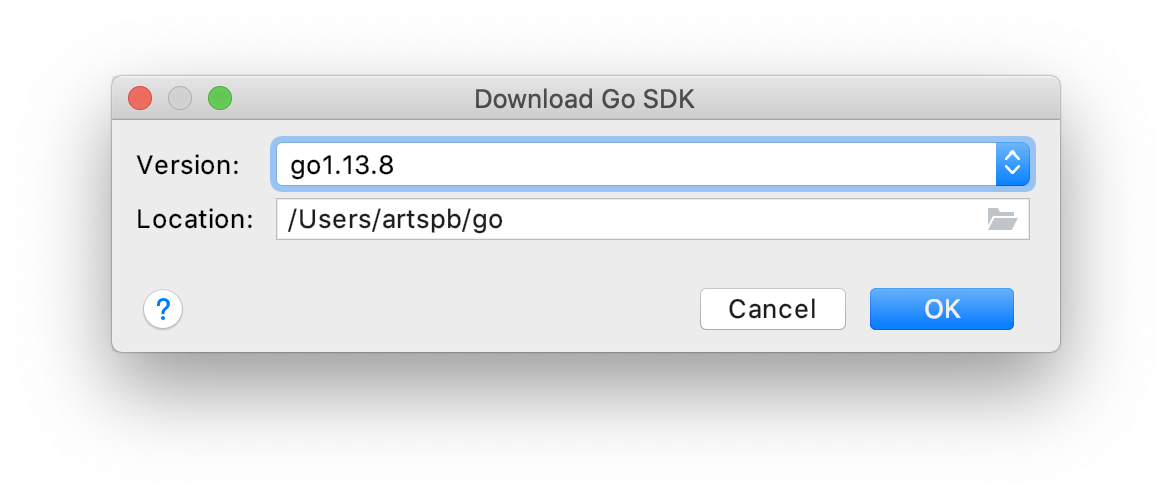
At the moment of writing, the latest version of TinyGo (0.12.0) doesn’t support the latest version of Go (1.14). Thus let’s use Go 1.13.8. Click on the plus button and choose Download… if you don’t yet have it installed.
- Now open Preferences | Go | GOPATH and point Project GOPATH to the TinyGo installation. On macOS, it’s located under
/usr/local/Cellar/tinygo/0.12.0. You might need the help of Command+Shift+Period to find this path using the native file chooser. Additionally, add the project directory to the list. It allows using packages in your project.
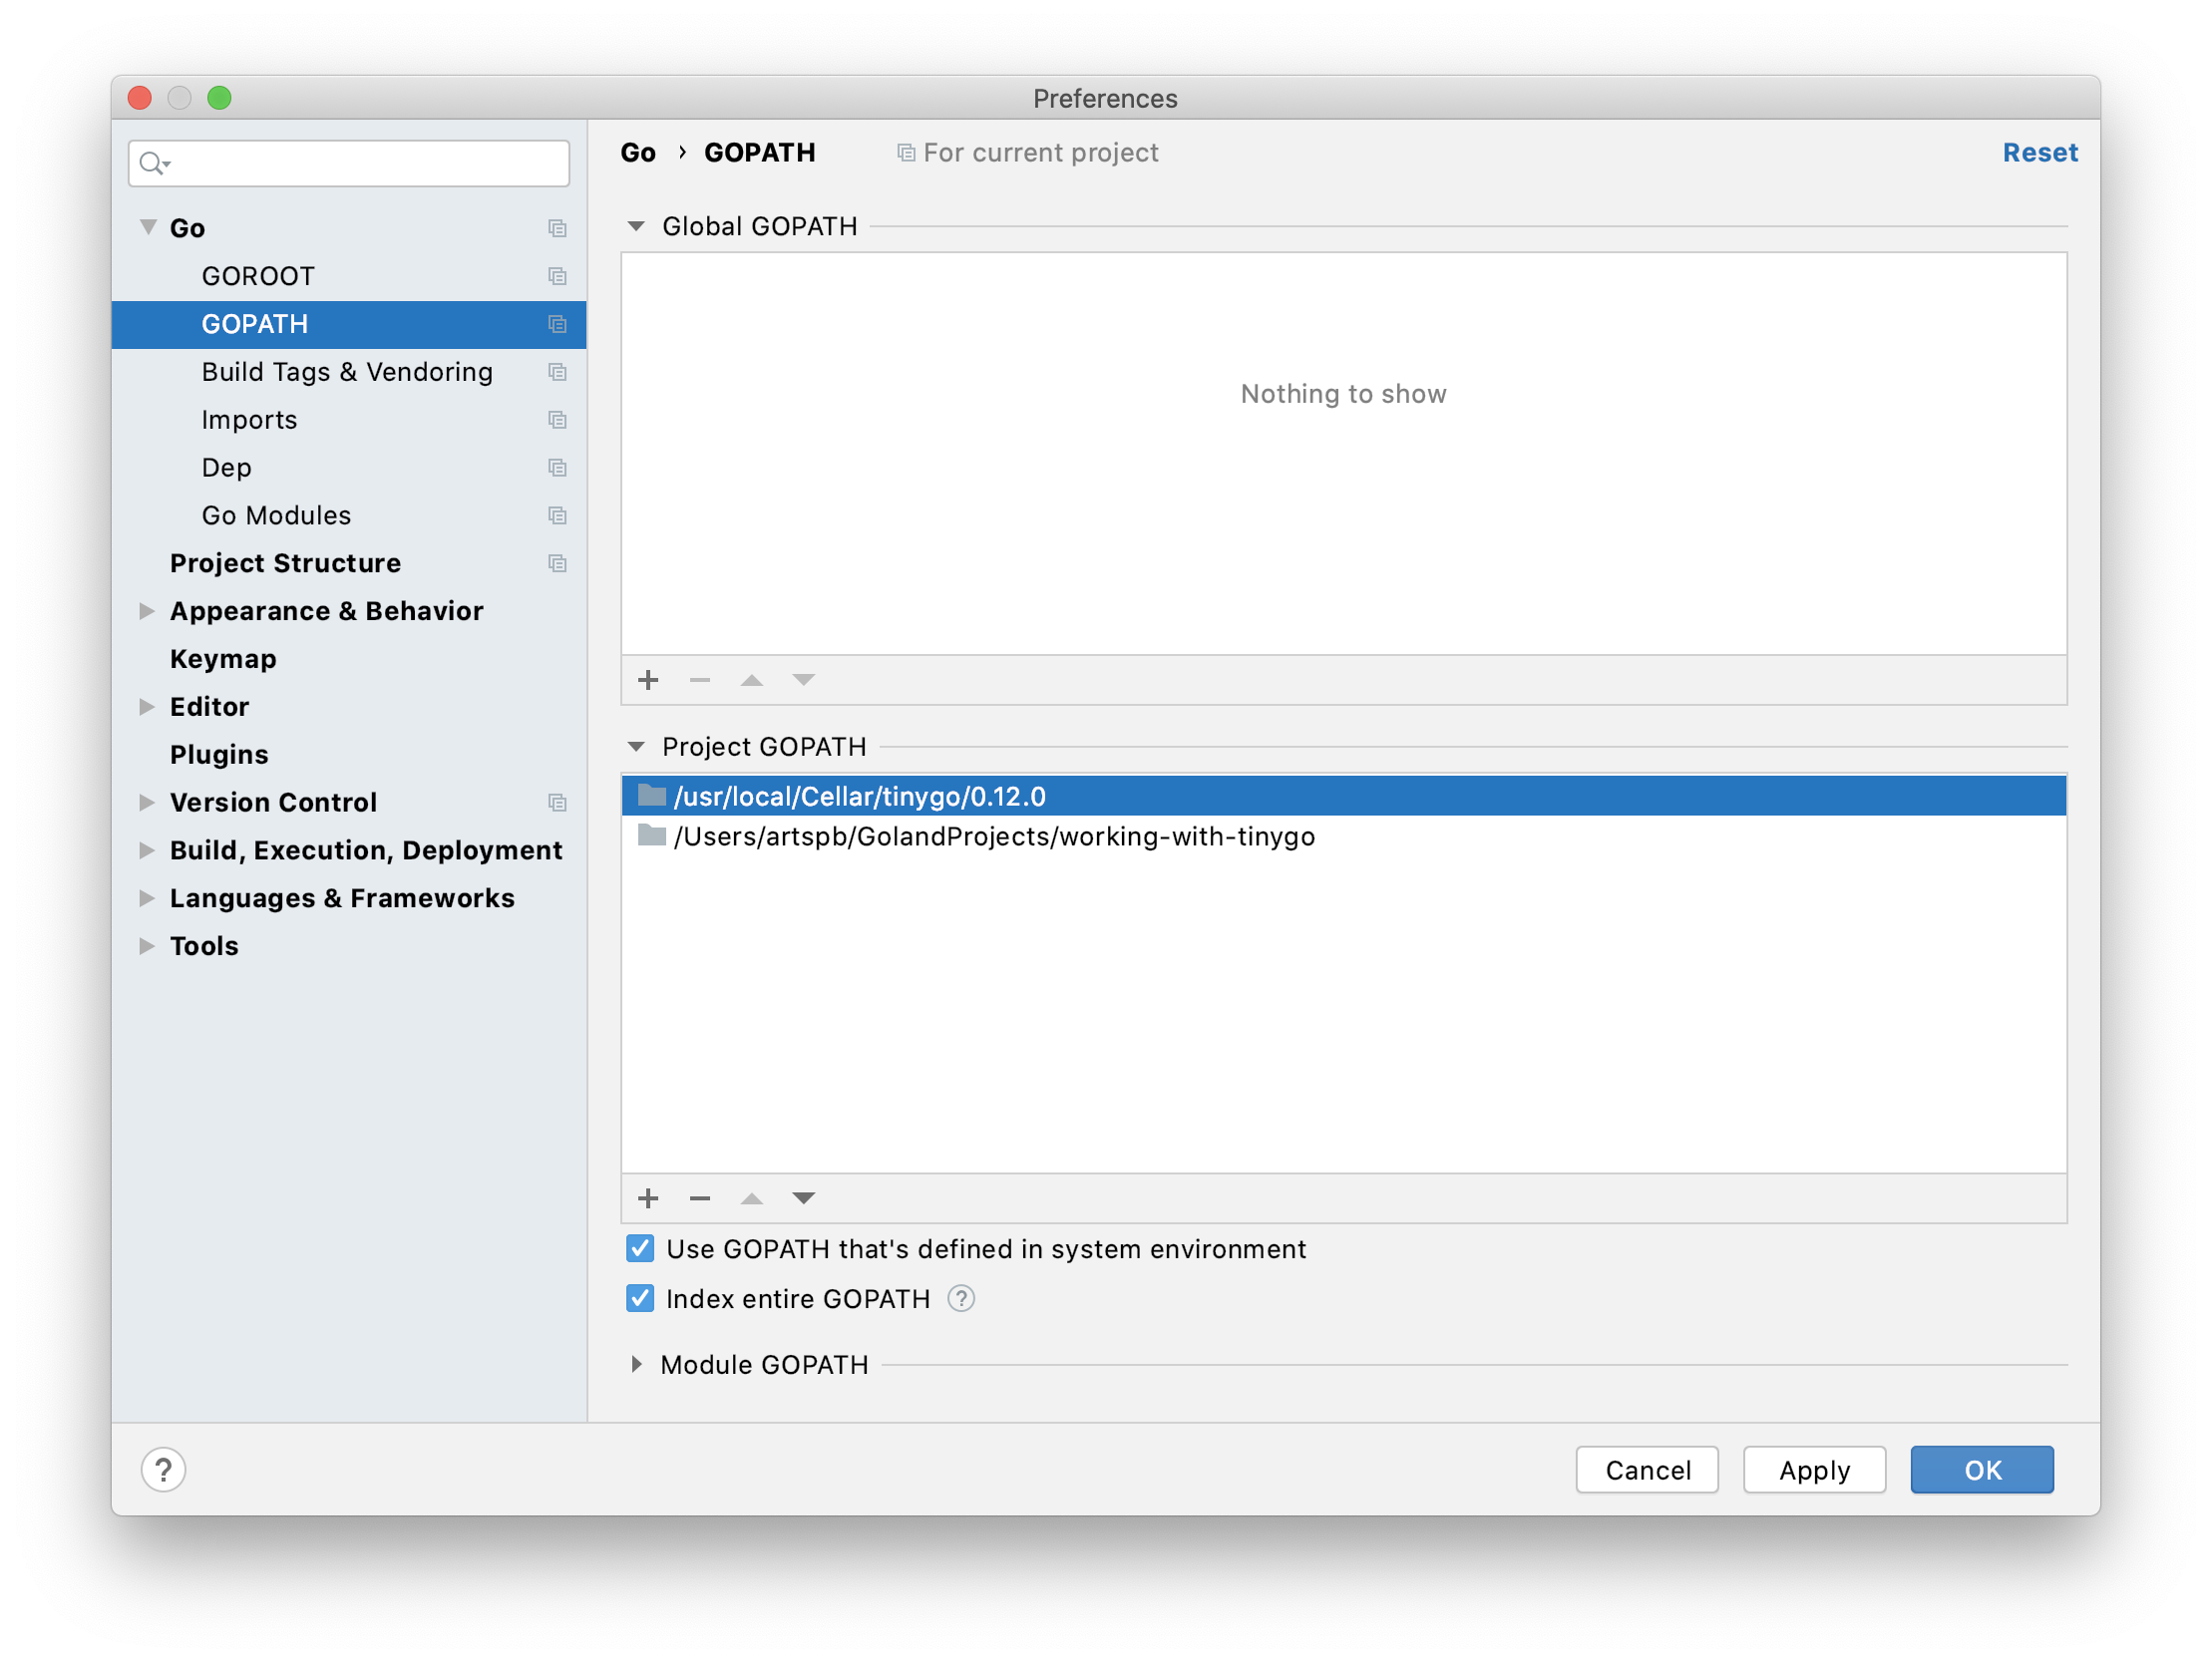
Also, this is a good time to check Index entire GOPATH back; otherwise, GoLand won’t find TinyGo SDK files.
- Let’s get back to the IDE for a second by pressing OK. GoLand starts building indices. While it shouldn’t take long as now
GOPATHconsists only of a few files, there’s no need to wait for it to finish. Open View | Tool Windows | Terminal. Runtinygo info -target arduinothere. Don’t forget to replacearduinowith a target that’s suitable for you.
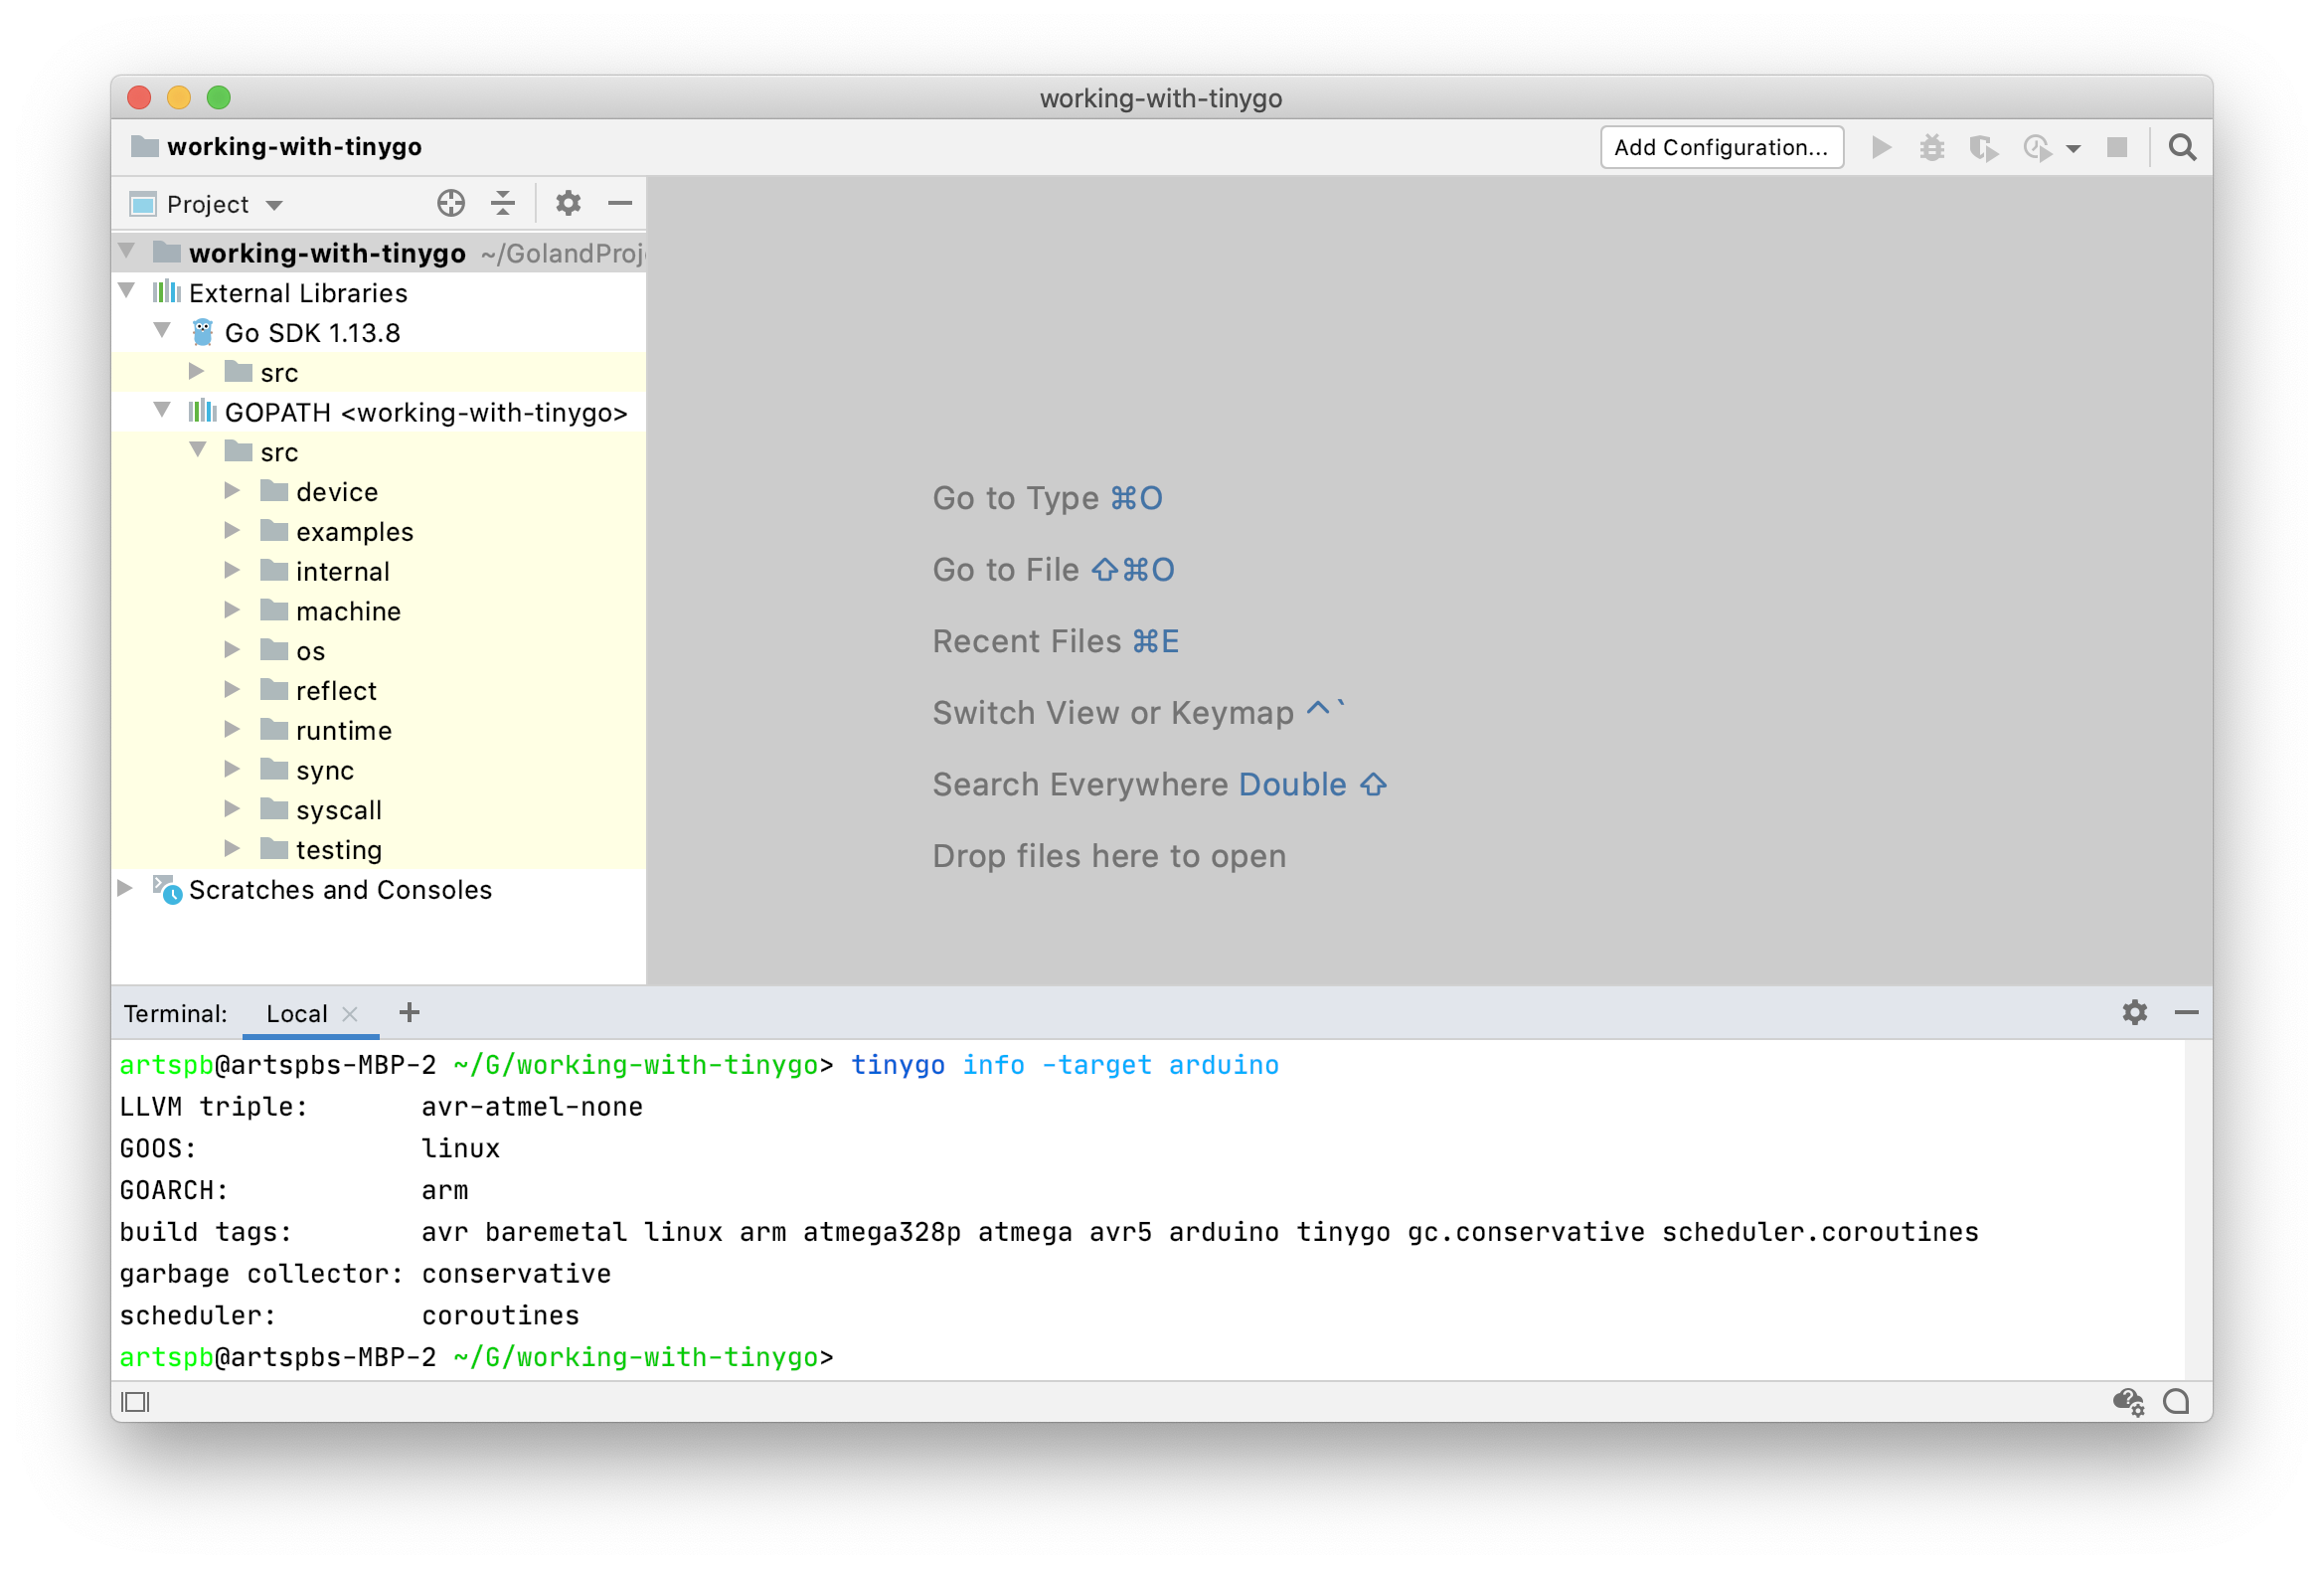
Remember GOOS and GOARCH, and copy build tags to a clipboard. We’ll use these parameters in the next step.
- Open Preferences | Go | Build Tags & Vendoring. I think it should be easy to figure out how to use parameters from the previous step.
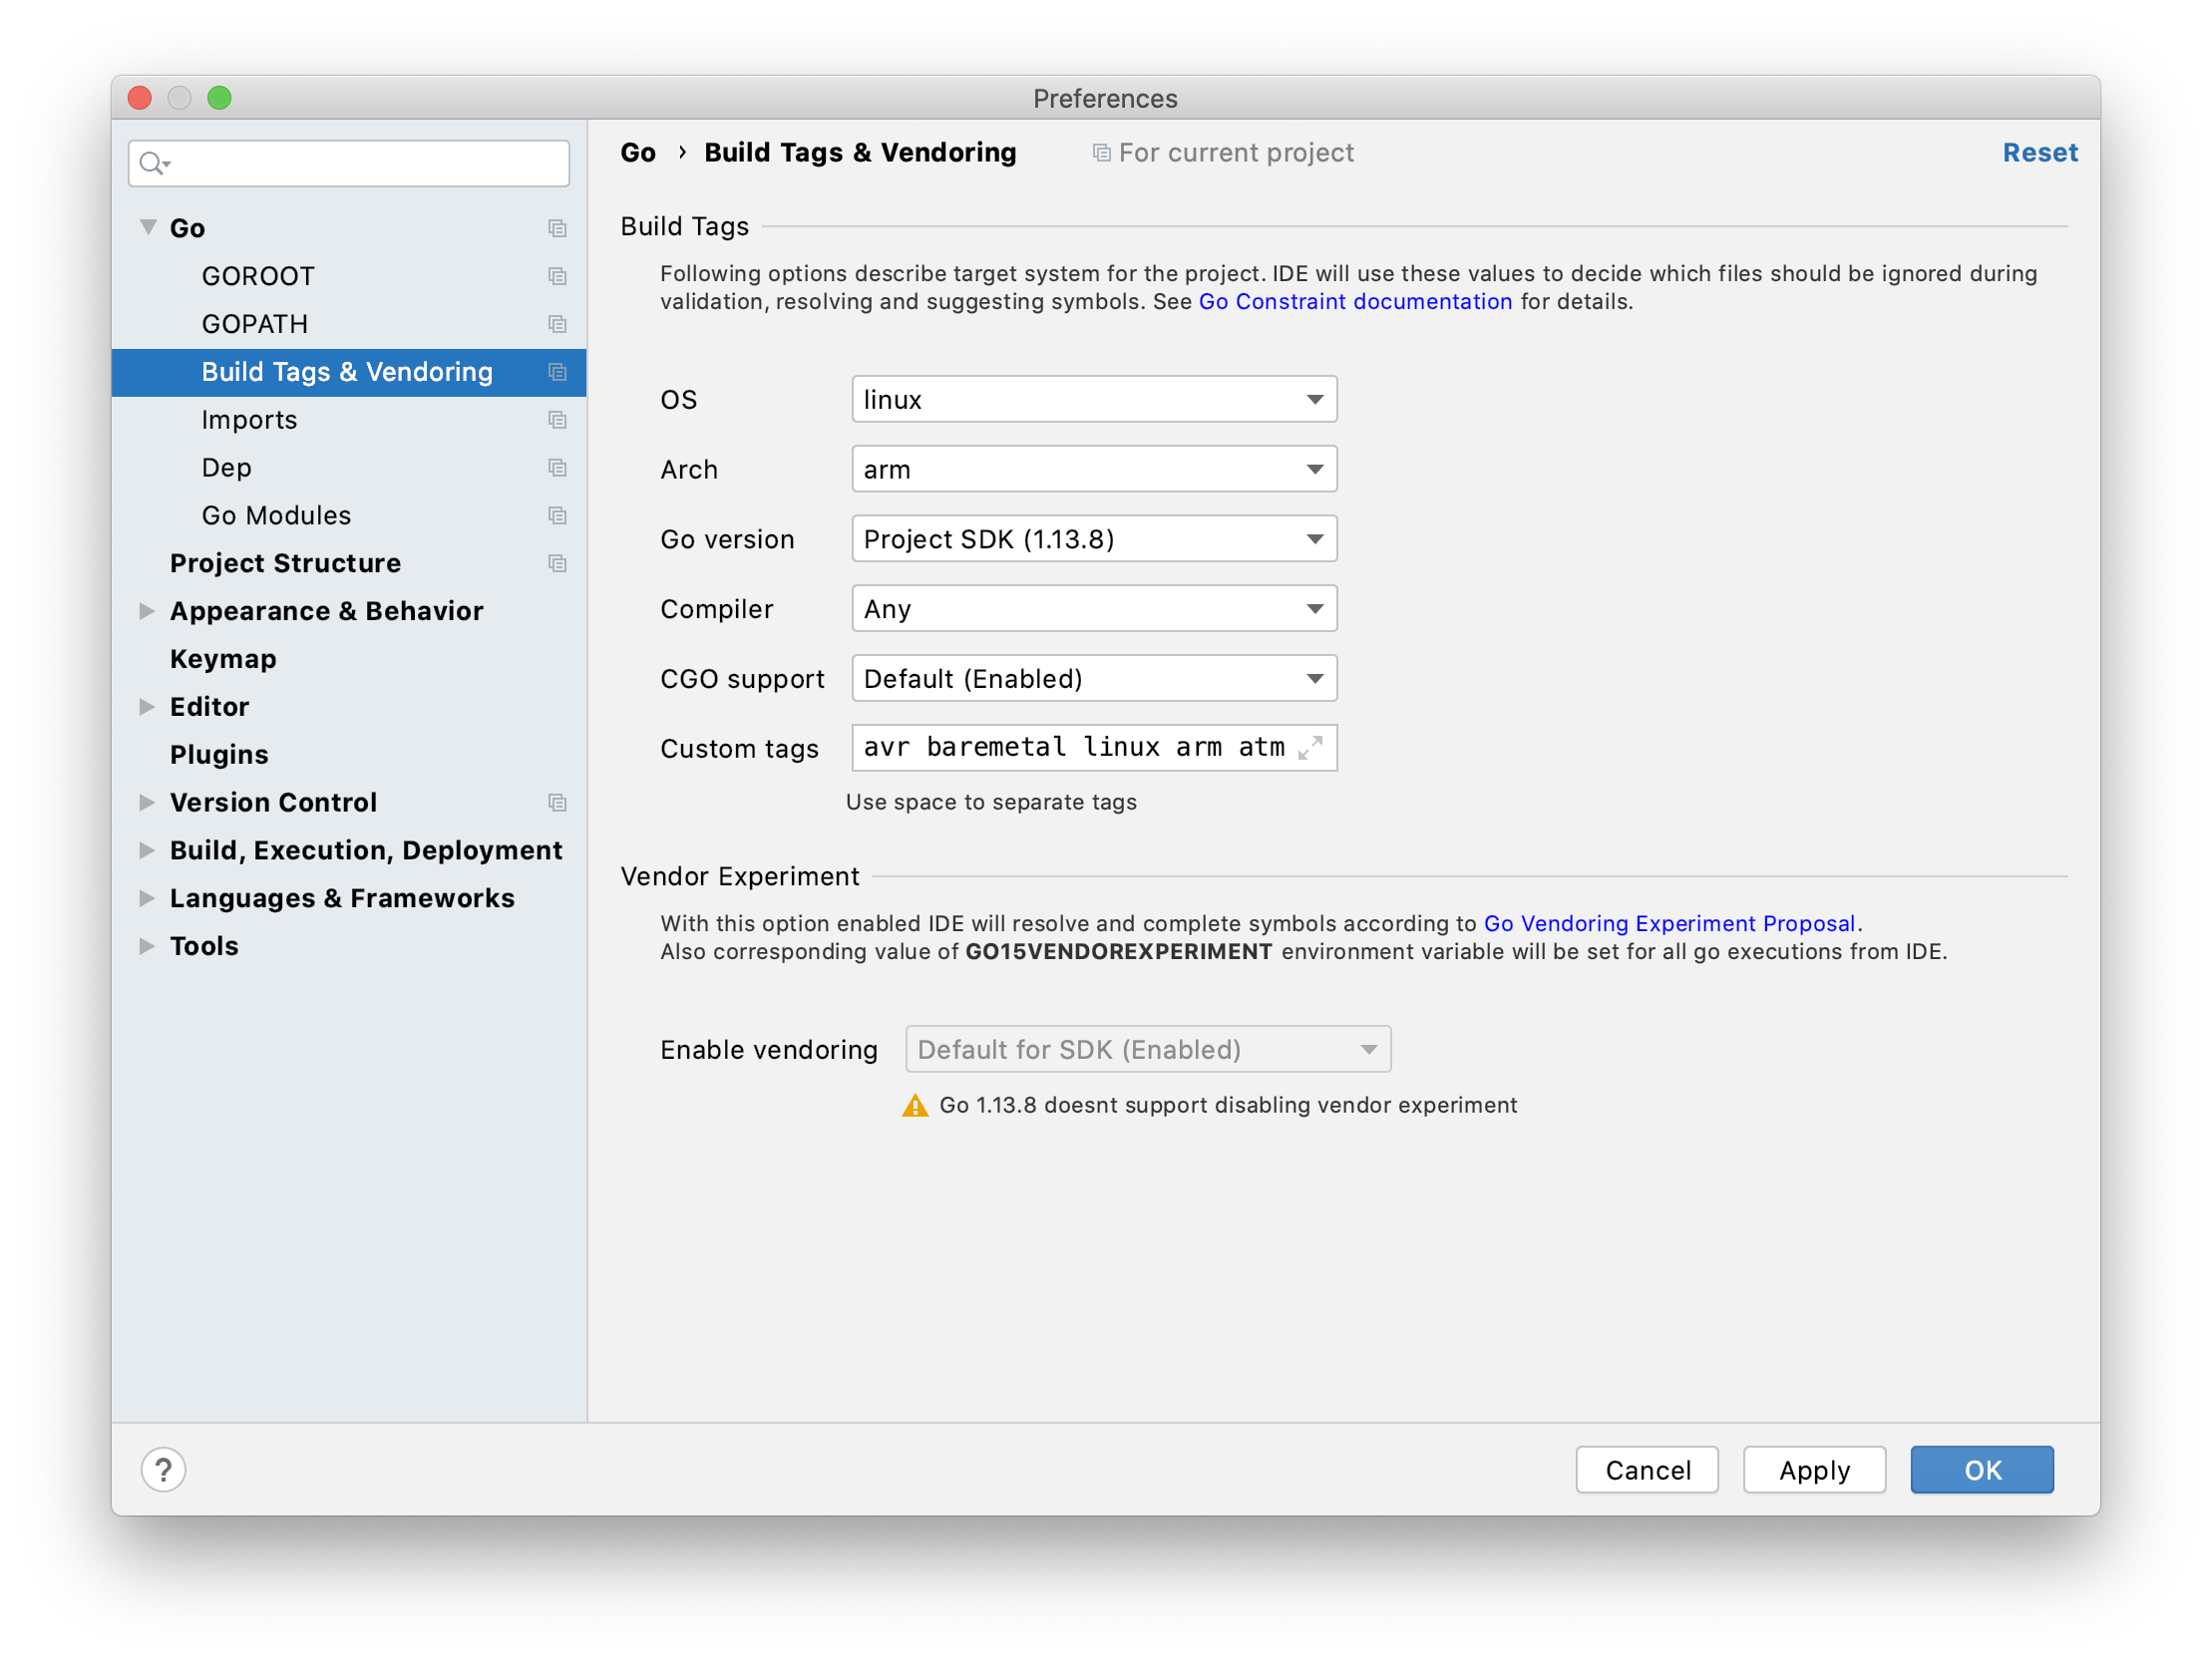
Don’t forget to close the dialog with the OK button to save the settings.
- That’s it for the configuration. Let’s now check how GoLand works. Copy
/src/examples/blinky1/blinky1.goto thesrcdirectory of the newly created project. The trick withsrcmakes the project looks likeGOPATHso you can use packages inside.
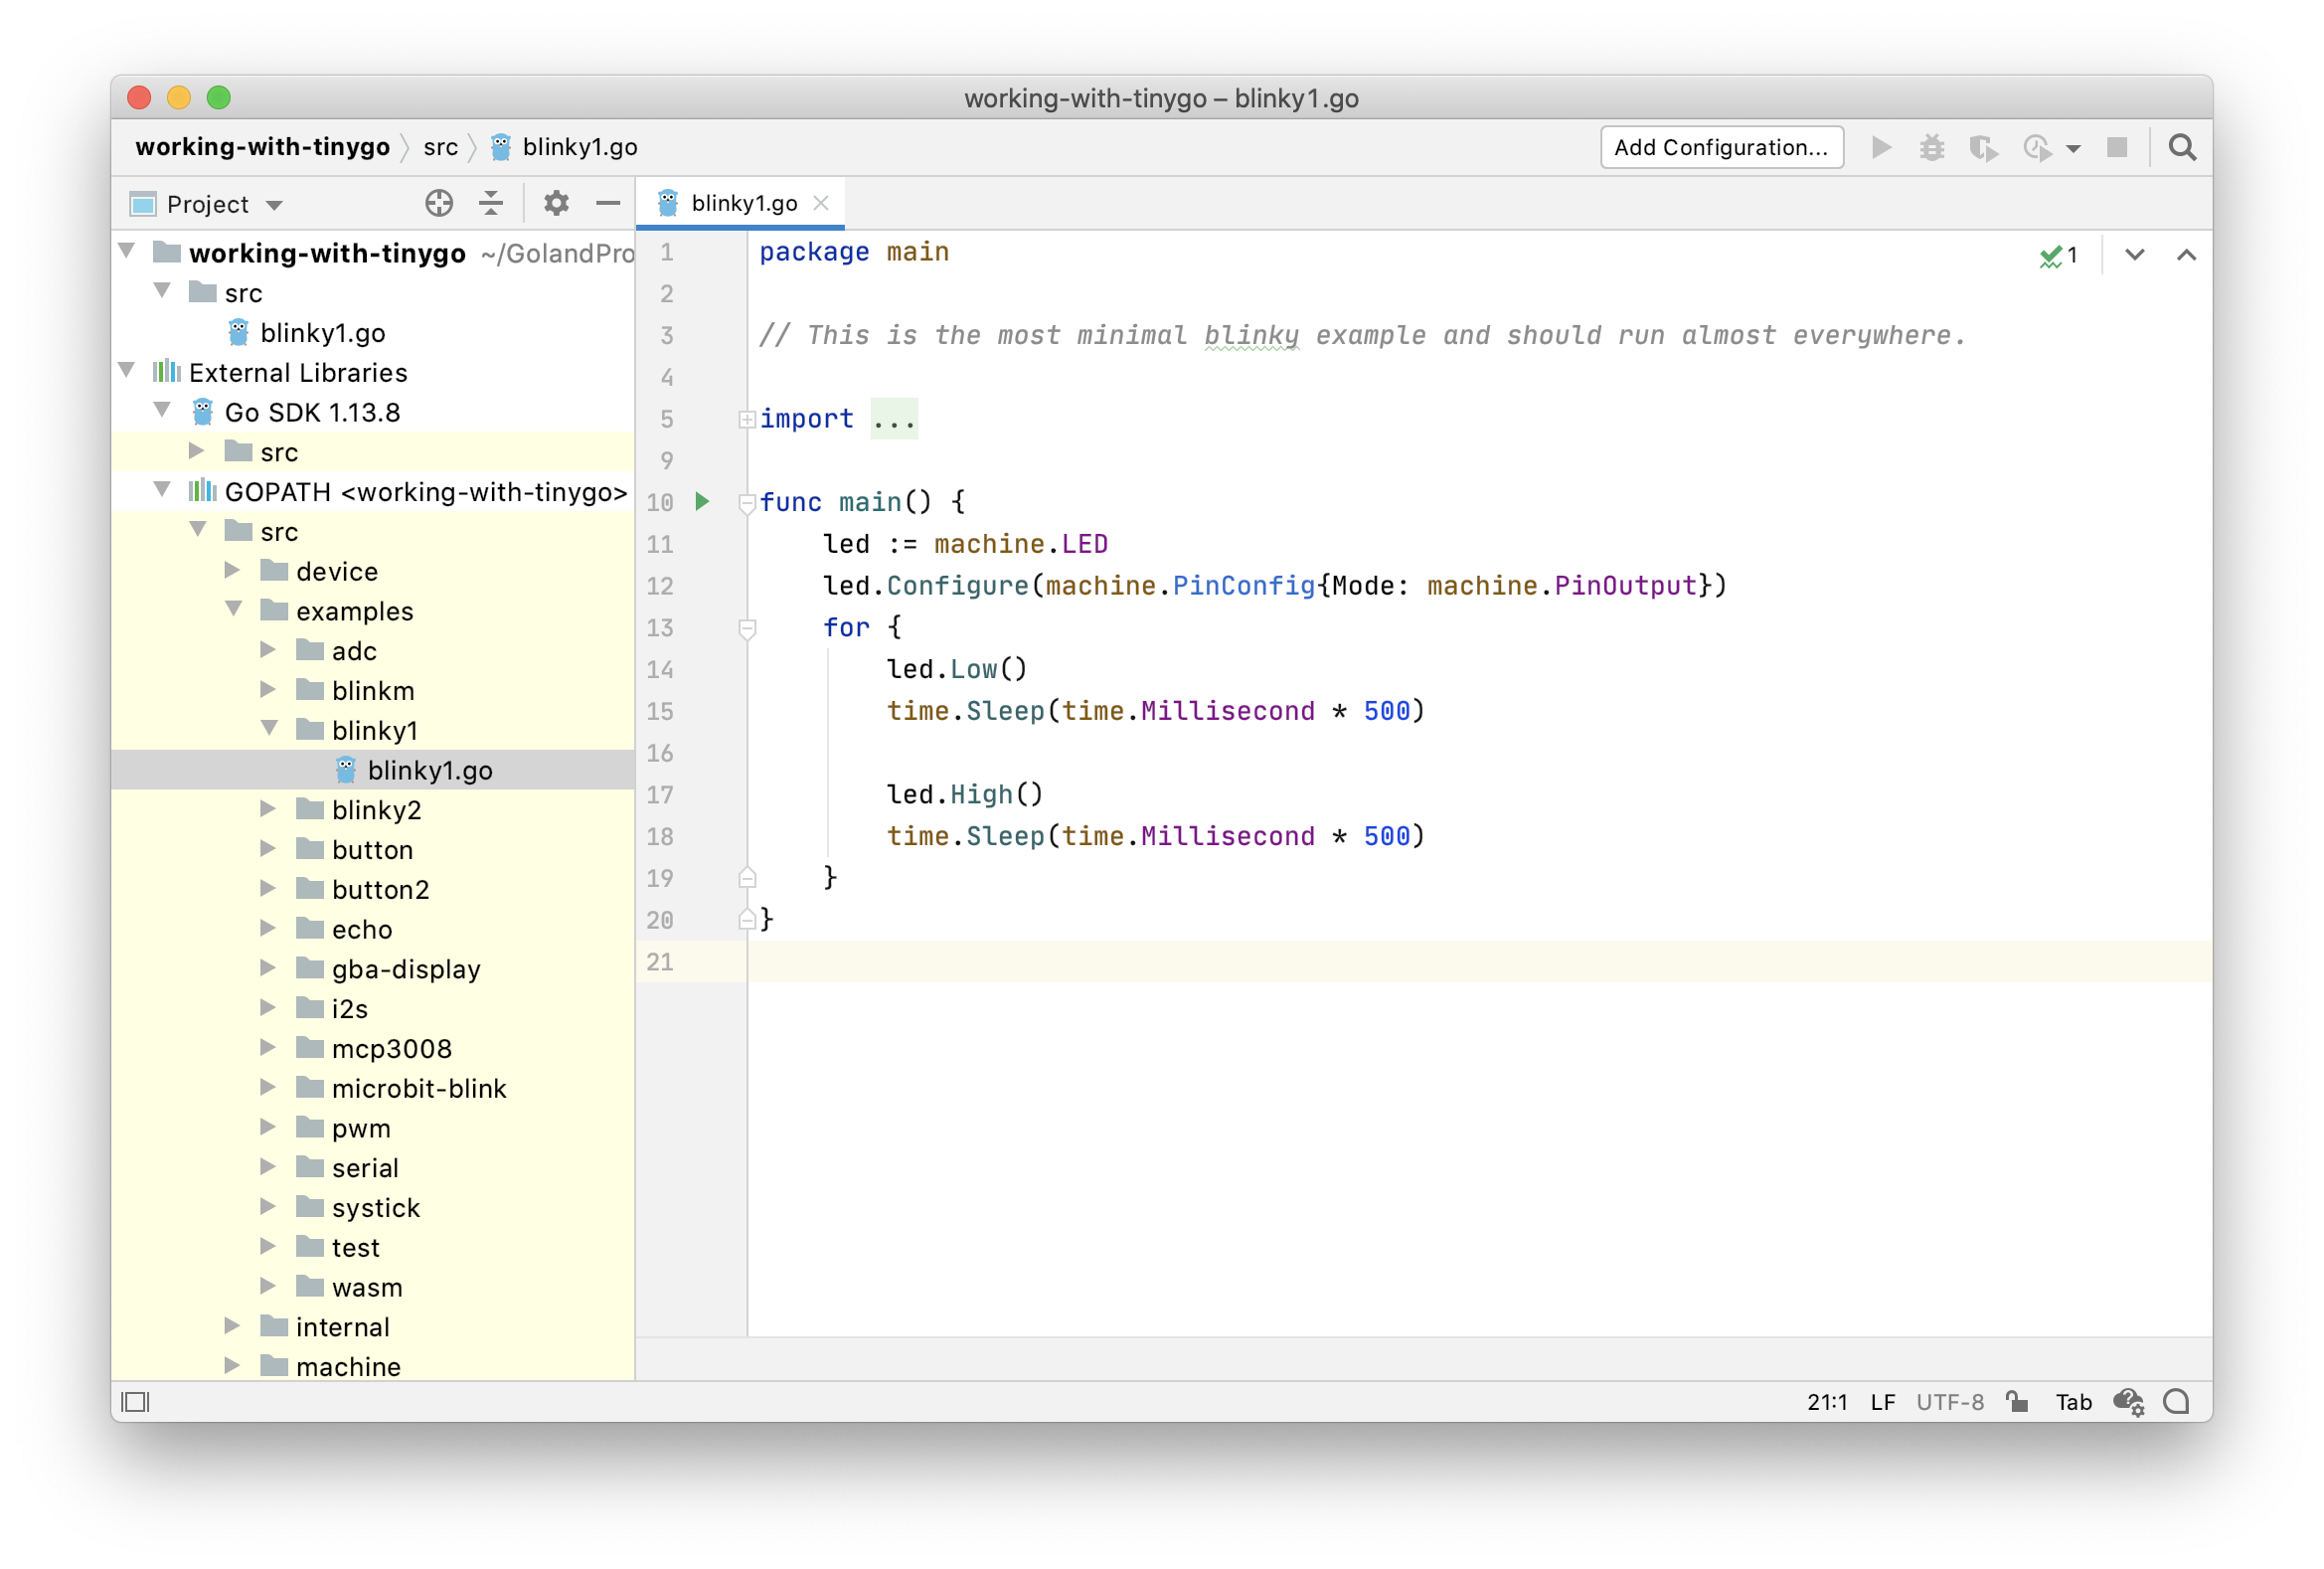
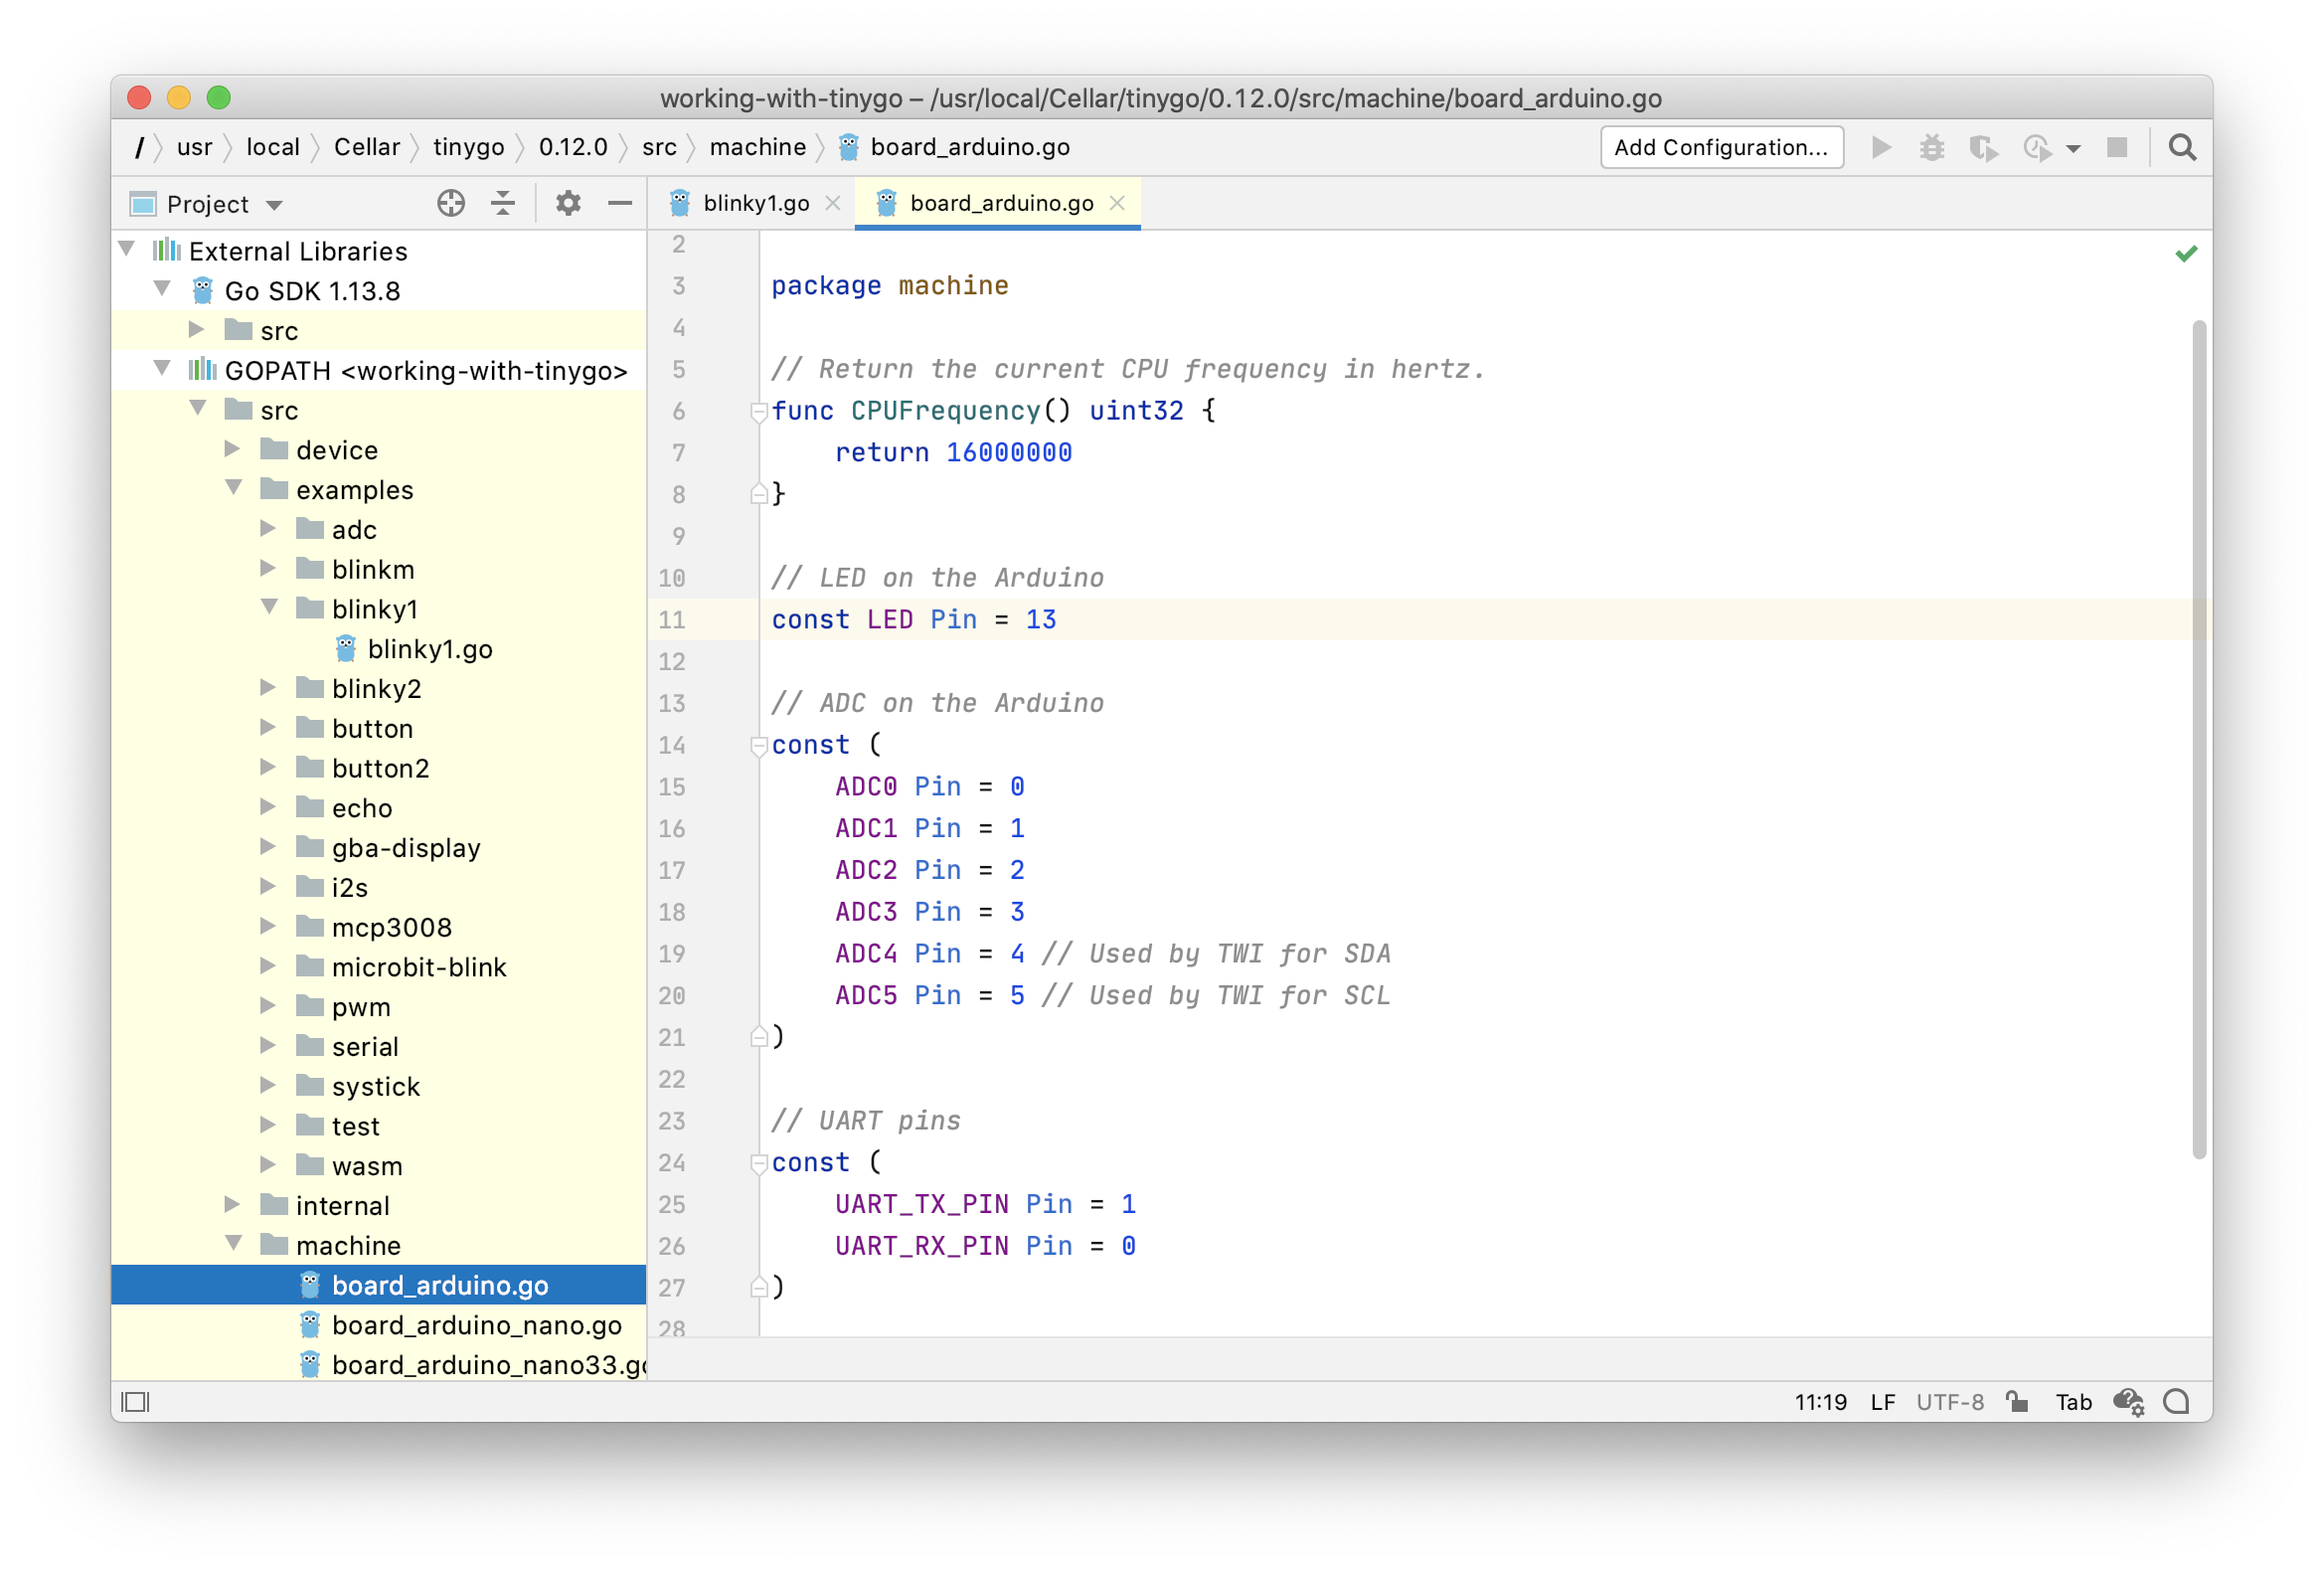
The code should be green; you should be able to navigate from any reference to its proper declaration. For instance, by Command+Clicking LED, you should get to board_arduino.go where it’s declared. Well, at least if you’re using Arduino 🙂
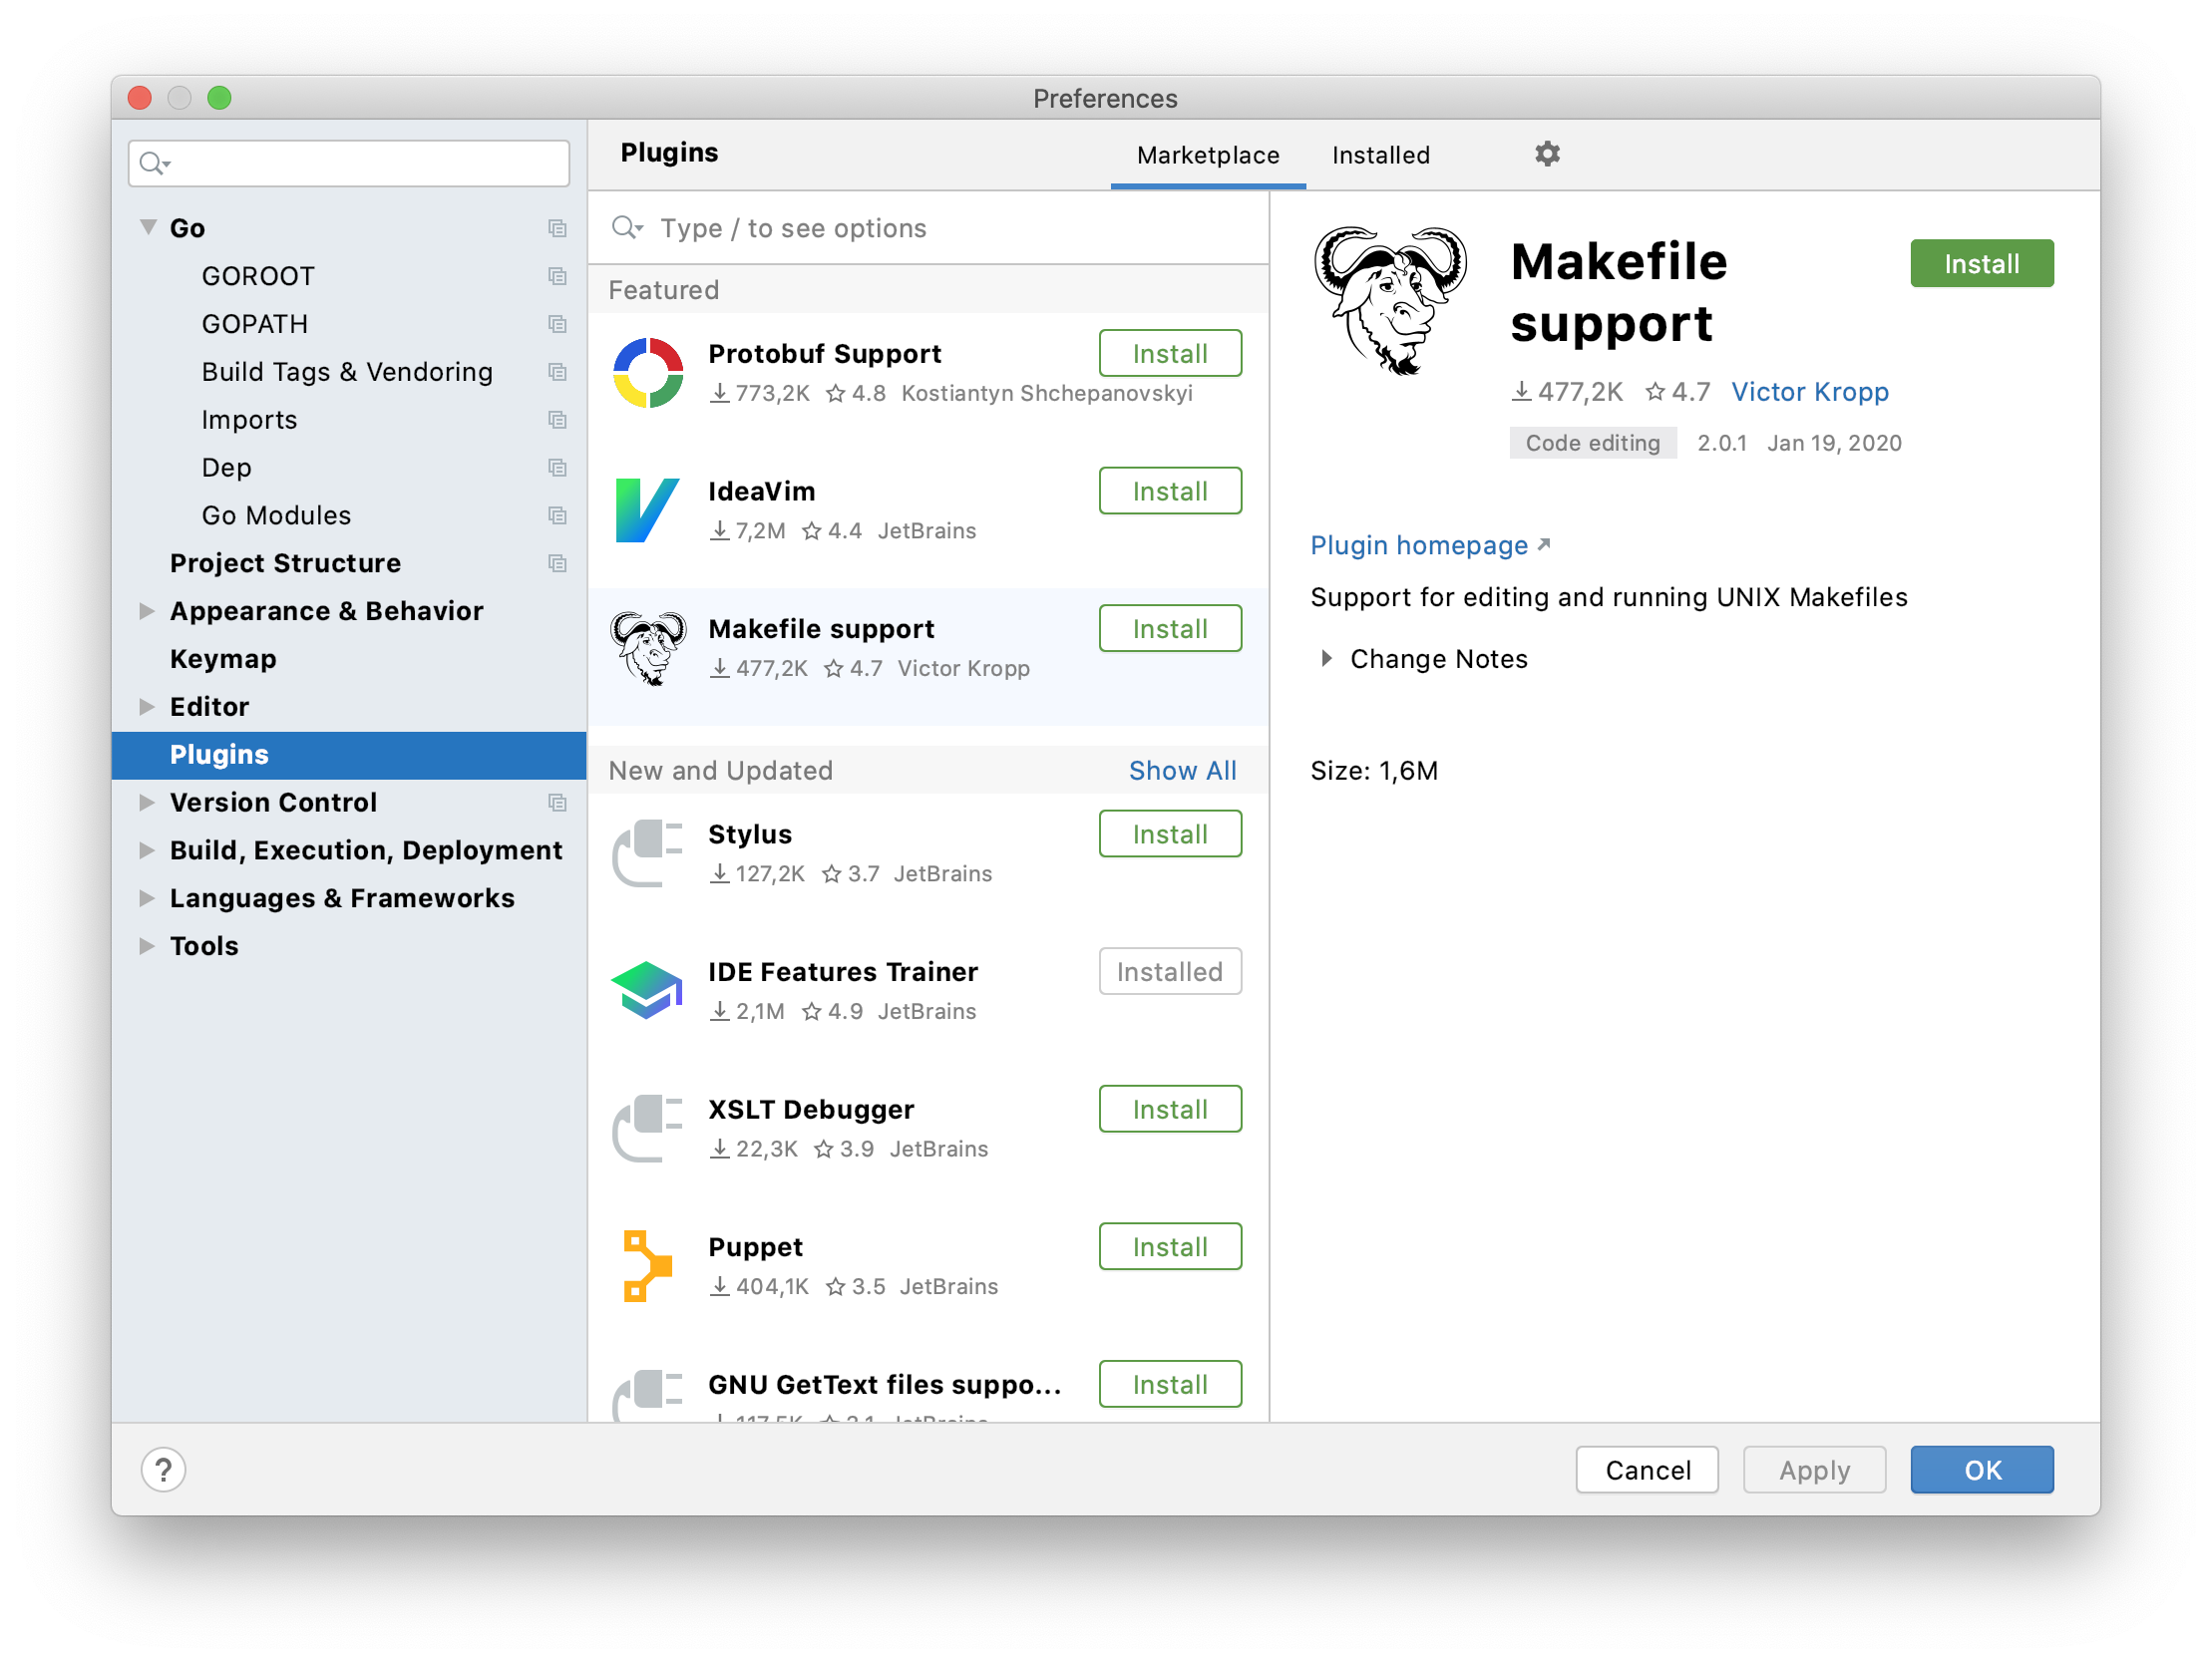
- While we could finish here, I’d still like to show you one more thing that I find useful. Proceed to Preferences | Plugins | Marketplace and install the Makefile support plugin. If you’re on GoLand 2020.1, you don’t even need to restart the IDE.
- Create
Makefilewith the following content. Don’t forget to specify the right target and port.
flash:
	tinygo flash -target=arduino blinky1.go
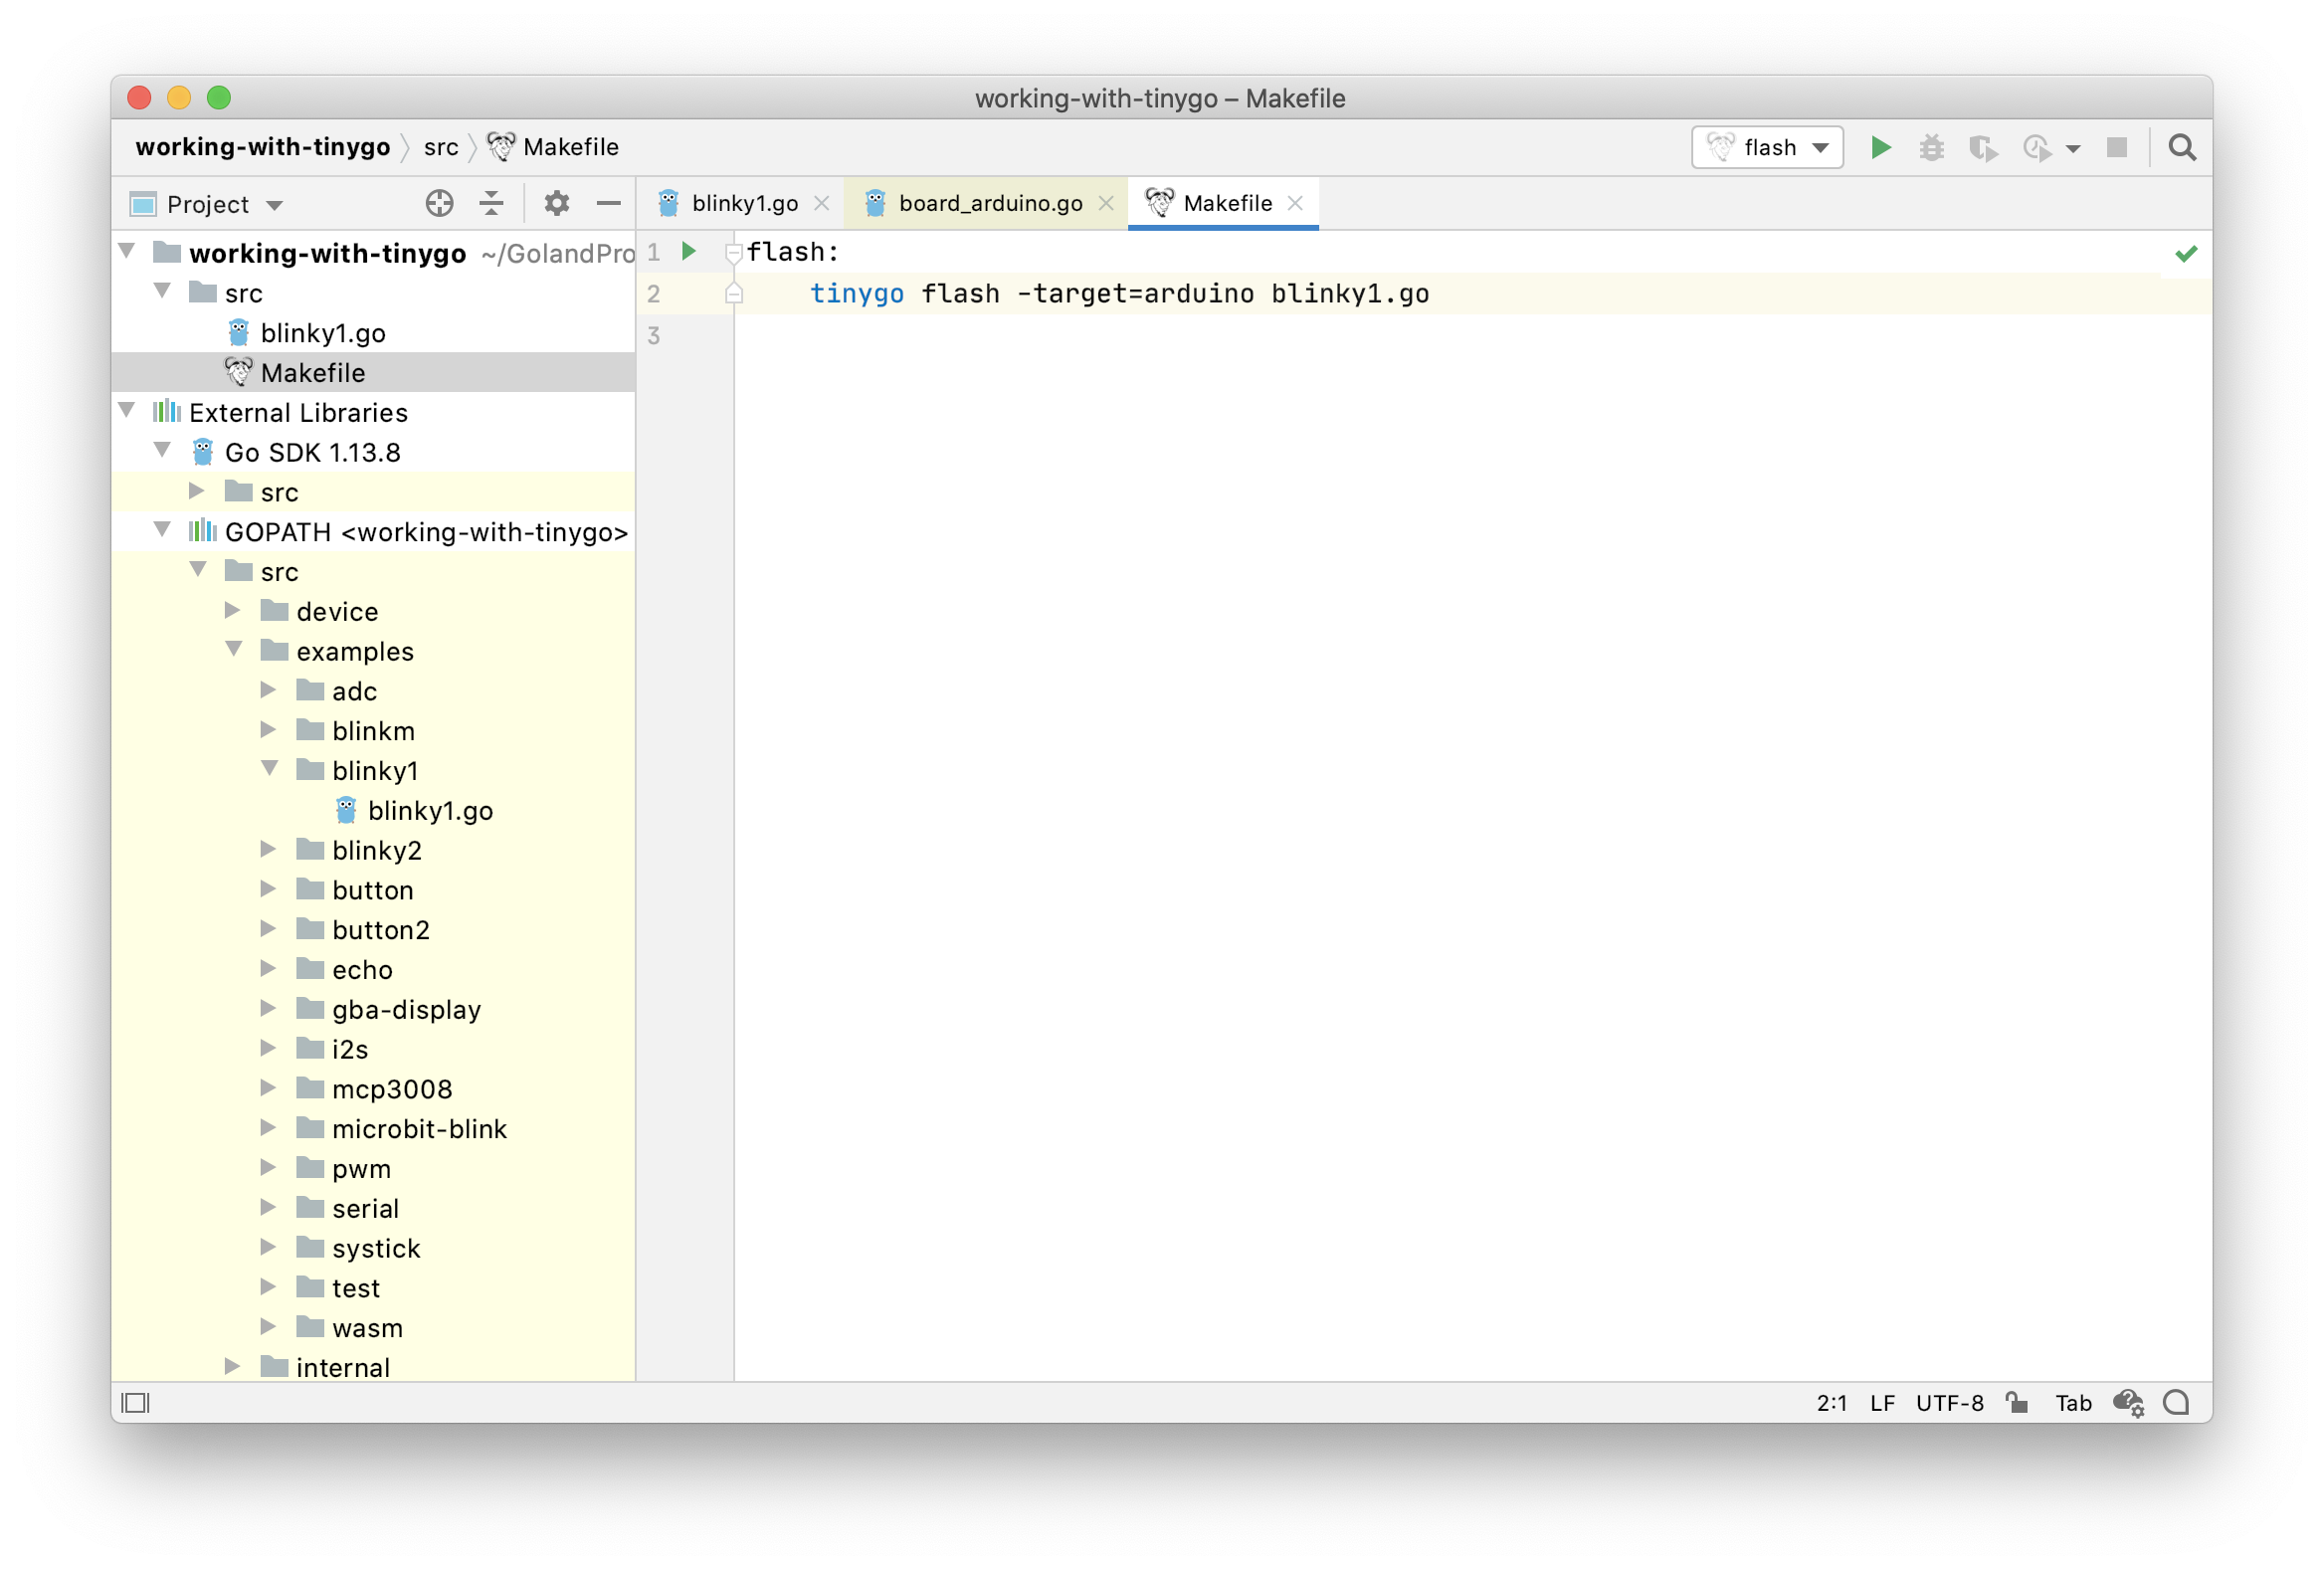
You can now run this command right from the IDE using the little green triangle in the gutter. If your system’s GOROOT points to the correct version, it should just work. Otherwise, a bit of a configuration is necessary.
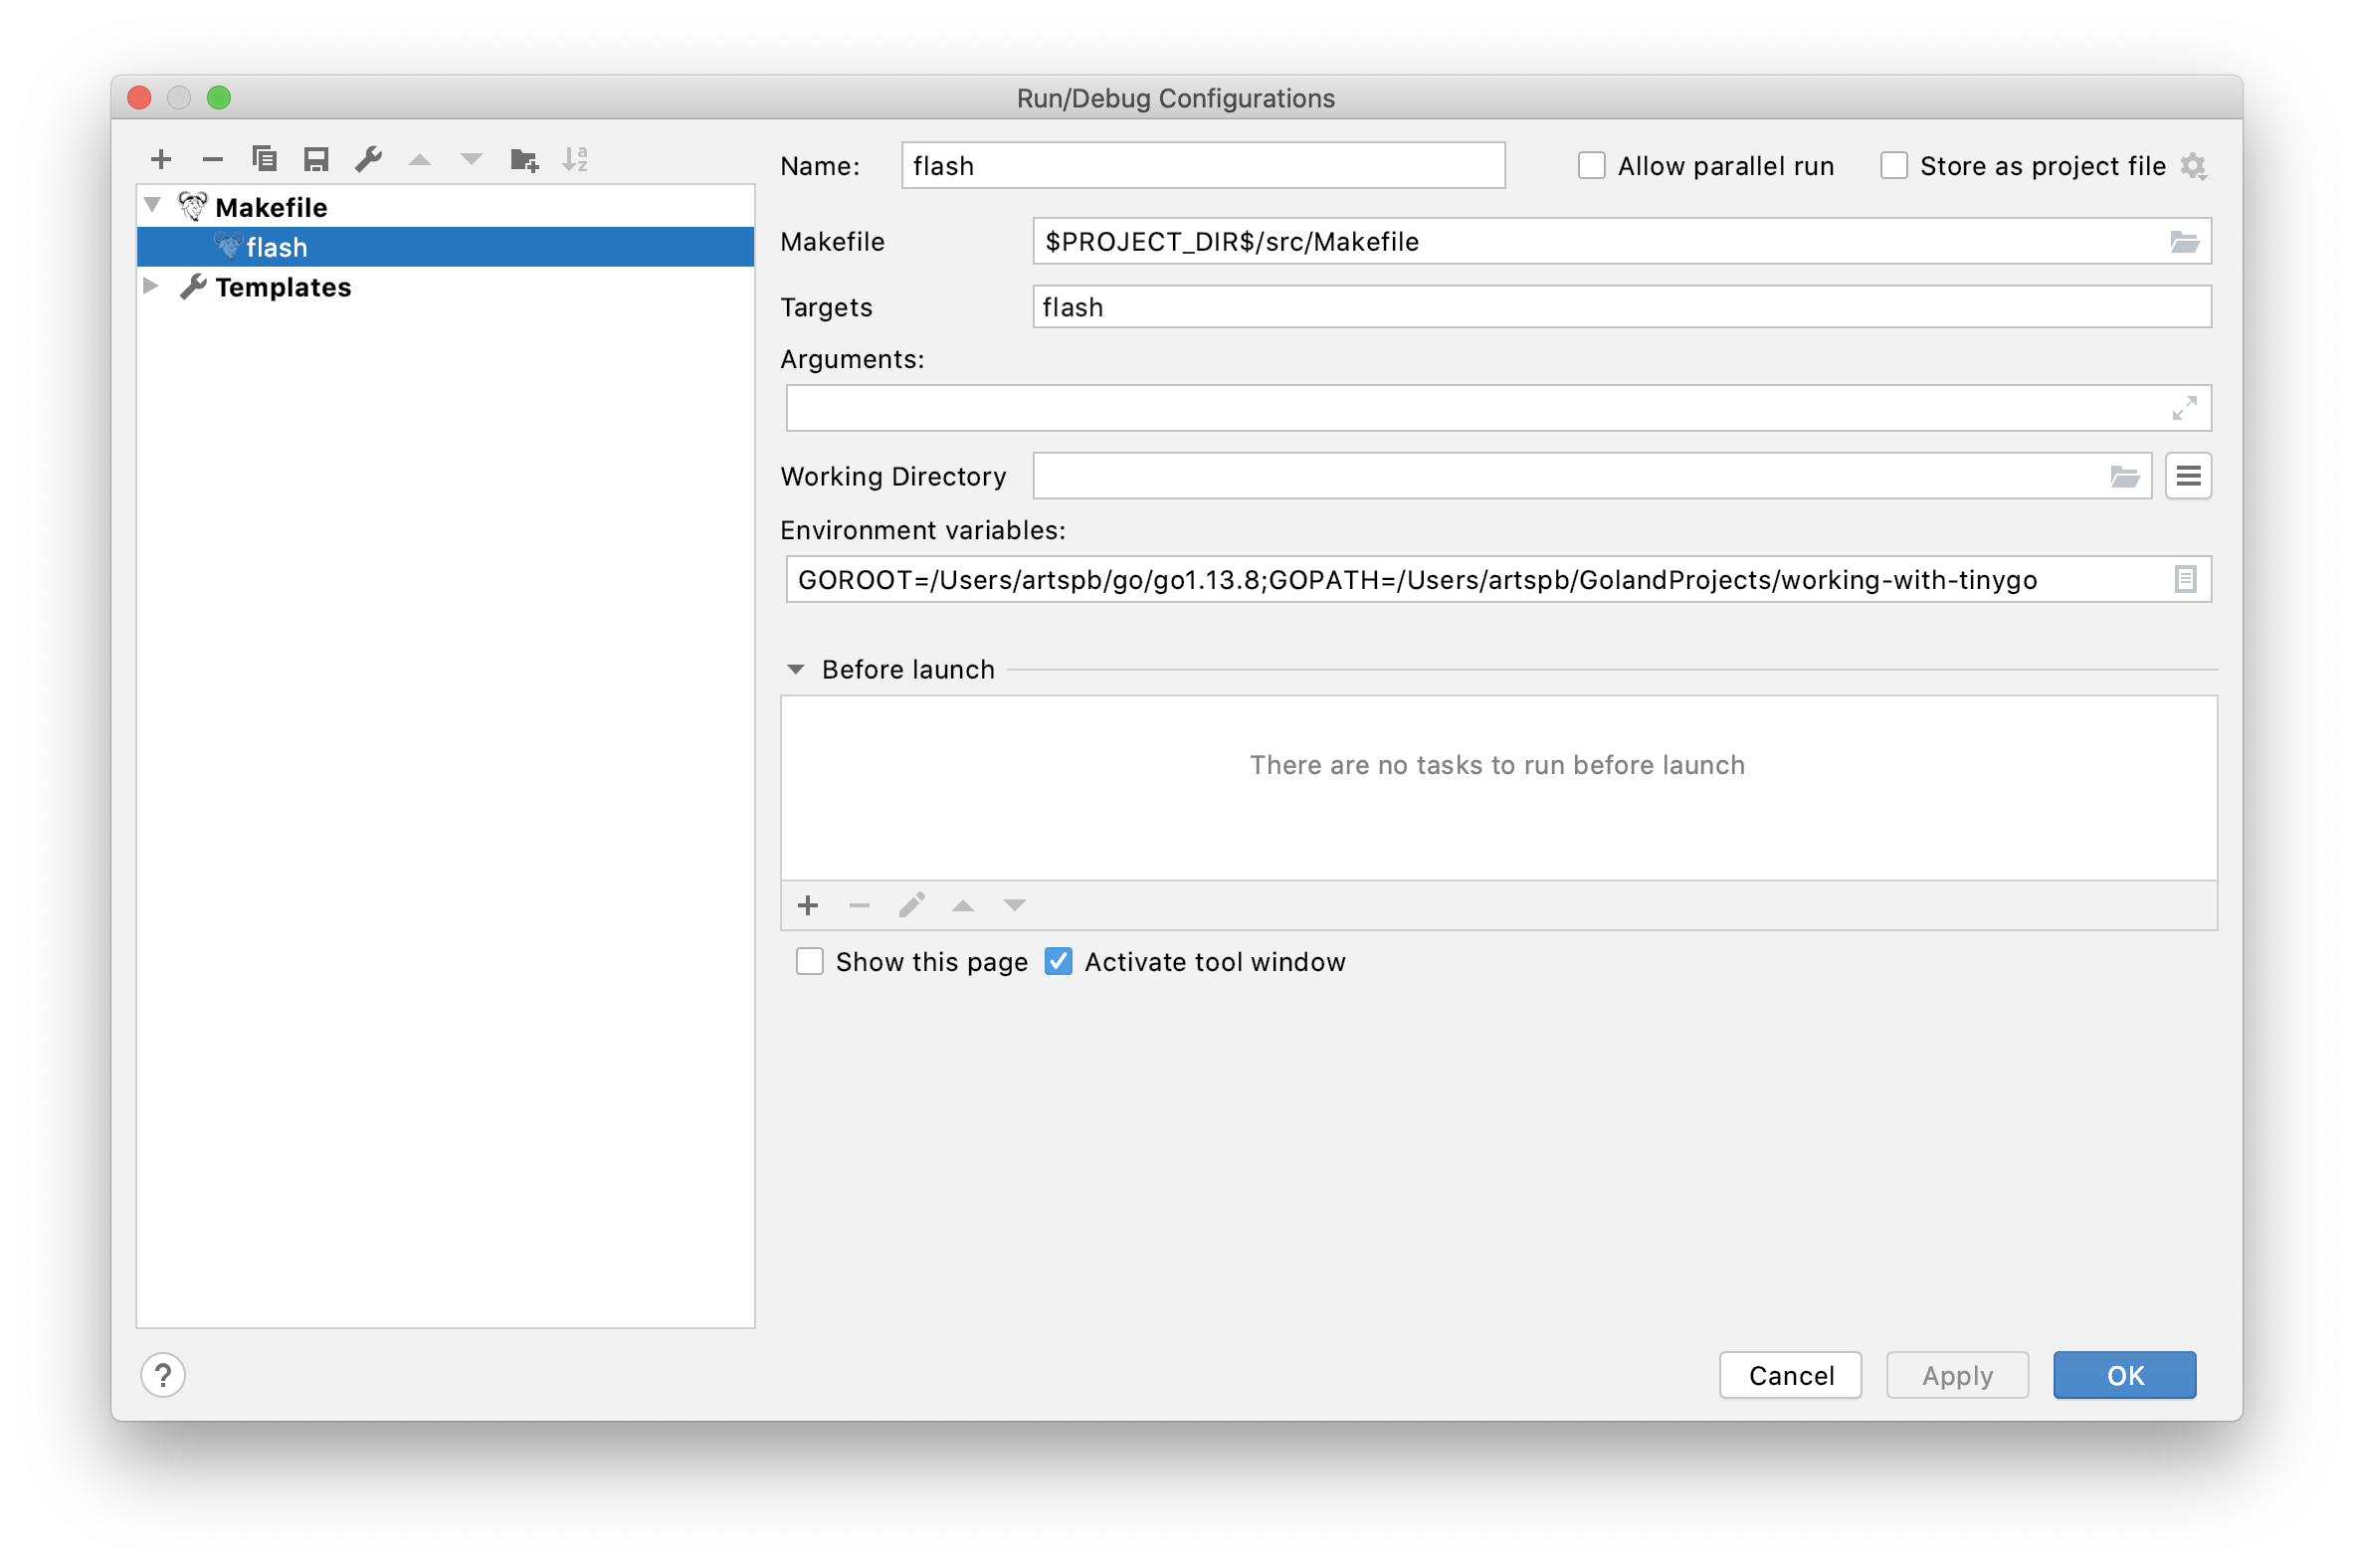
- Open Run | Edit Configurations… Select flash and add
GOROOT=/Users/artspb/go/go1.13.8;GOPATH=/Users/artspb/GolandProjects/working-with-tinygoto Environment variables.
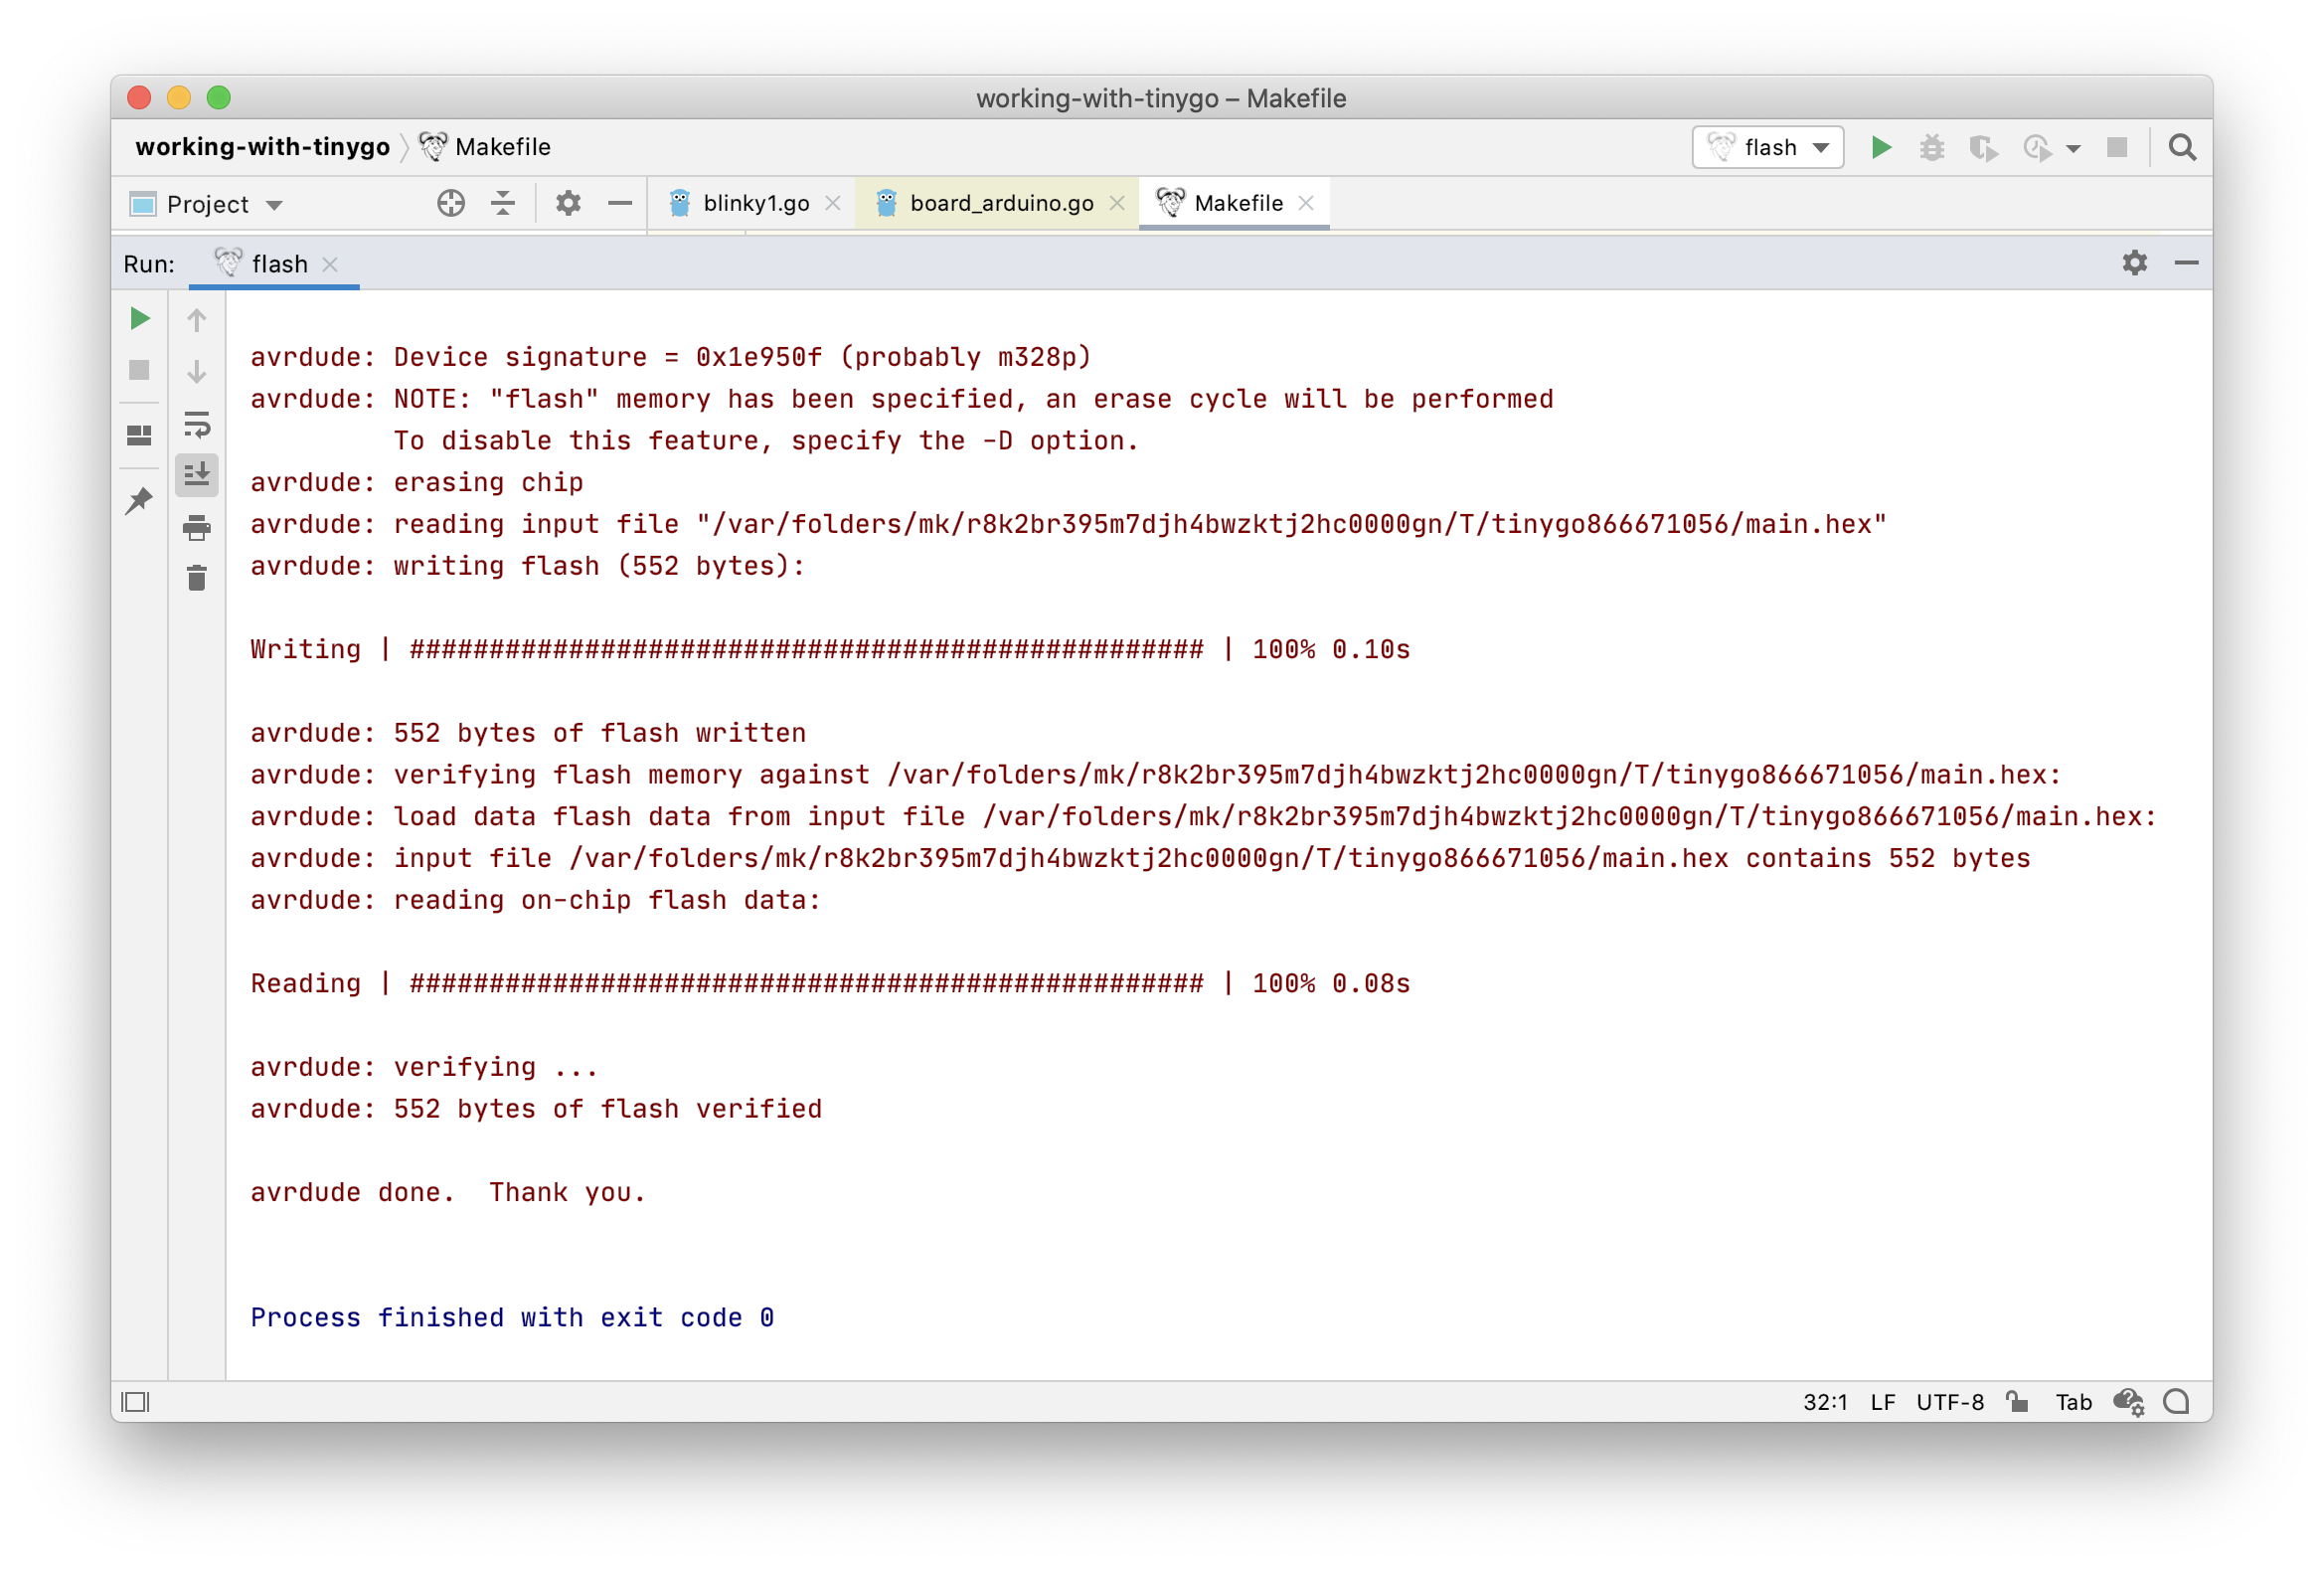
- When you rerun flash, TinyGo should build a program and upload it to the board. As a result, its LED should start blinking. Of course, if it has one 🙂 I’m too lazy to record a video, but I hope you believe that my Arduino Uno copes well with this task.
Troubleshooting Link to heading
- If something doesn’t work, check that the integration is disabled under Preferences | Go | Go Modules. As for now, TinyGo doesn’t work well with
go list.
I hope this tutorial was useful for you. As always, I appreciate any feedback. Please share it here or anywhere where you can find me.
Update. You can find the example project that we’ve created on GitHub.
Ever wanted to play with @TinyGolang but dared? The time has come! You only need to install @GoLandIDE , buy a board, wire it properly, wire it again, write code, rewrite code, ask for help on Slack, rewrite code again, file a bug, find a solution, drop... https://t.co/EBBUs0TyU7
— Artem Khvastunov (@art_spb) March 12, 2020